
You are standing in your kitchen, holding a pot of boiling pasta water. You turn to pour it into the colander, but your elbow knocks into the refrigerator door. You try to rinse a plate, but the cabinet door under the sink hits your shin. It’s a dance of frustration that happens every single day.
We often think that to fix a tiny kitchen, we need to knock down walls or build an extension. But the truth is, the secret to a functional, dreamy kitchen often lies in ergonomics—specifically, where you put the sink. It is the most used appliance in the room. If the sink is in the wrong spot, the whole room feels smaller than it actually is.
Why Small House Kitchen Sink Placement Matters in Tiny Spaces
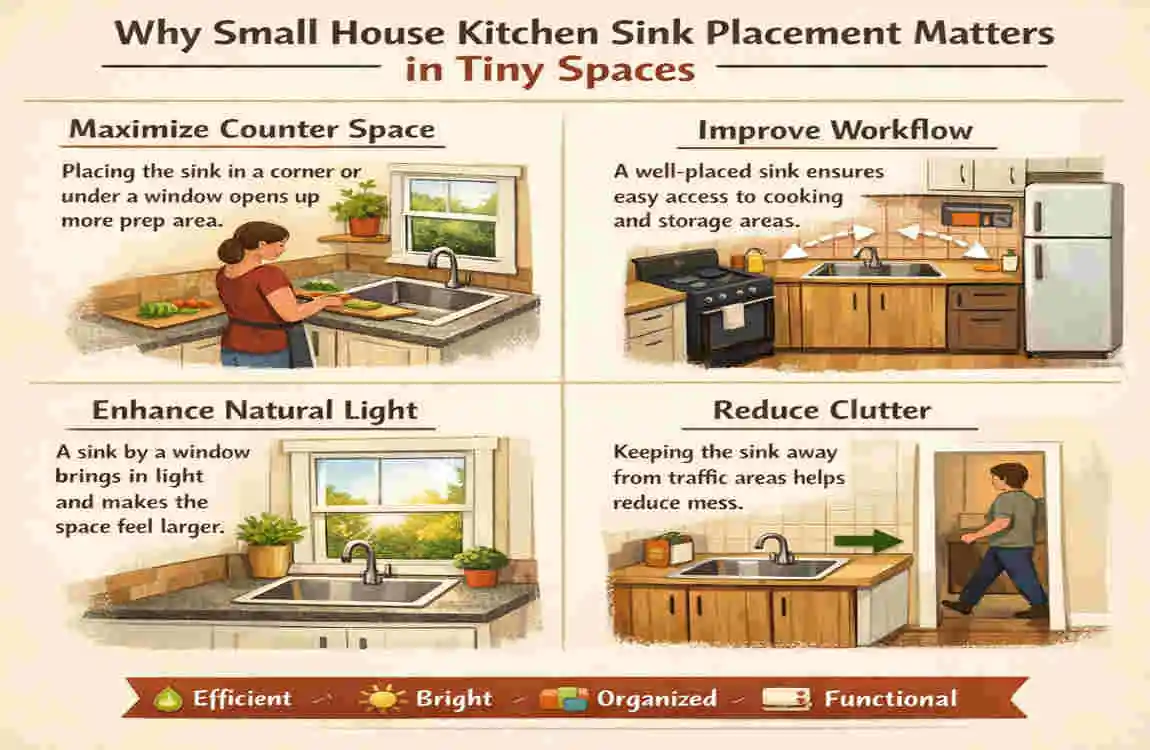
You might be thinking, “It’s just a sink. Does it really matter where it goes?” In a large house, you can get away with a few layout mistakes. In a tiny house, every inch counts. Here is why optimizing your small house kitchen sink placement is the single most impactful change you can make.
The Kitchen Work Triangle
For decades, designers have relied on the concept of the “Kitchen Work Triangle.” This connects the three main work areas: the stove, the refrigerator, and the sink.
In a massive kitchen, the goal is to keep these points close enough so you don’t have to run a marathon to make dinner. However, in a small kitchen, the problem is the opposite. The points are often too close, causing congestion. If your small house kitchen sink is directly next to the stove, with no counter space between, you have nowhere to chop vegetables or set down a hot pan.
By strategically placing the sink, you can “stretch” this triangle, creating invisible zones for prep, cooking, and cleaning, even in a 50 sq ft footprint.
Common Pitfalls of Poor Placement
When the sink is an afterthought, you run into three major issues:
- Blocked Counters: A sink placed right in the middle of a short run of cabinetry breaks up your prep space. You end up with two tiny 6-inch strips of counter on either side, neither of which is big enough for a cutting board.
- Traffic Jams: If your sink is placed directly behind a doorway or opposite the oven door, you create a bottleneck. If one person is washing dishes, no one else can walk through the room or open the oven.
- Hygiene and Moisture: Poorly placed kitchen sink in a small house often leads to splashing onto nearby appliances or, worse, onto dining tables if the kitchen is part of an open-plan living room.
The Benefits of Getting It Right
When you nail the placement, the benefits are immediate. You can expect faster prep times—studies suggest an optimized layout can save you 20% of your kitchen time, simply because you aren’t fighting your environment. Furthermore, as we move through the 2020s, current data suggests a 40% rise in compact kitchen trends. A well-designed small kitchen significantly increases your home’s resale value.
Before we start ripping out plumbing, however, we need to understand exactly what we are working with.
Assessing Your Space for Ideal Small House Kitchen Sink Placement
You cannot hack your kitchen until you know its limits. Before you fall in love with a farmhouse sink on Pinterest, you need to grab a tape measure and assess your reality.
Measure Key Areas
Start by measuring your total counter space. Then, measure the “swing” of every door and drawer in the kitchen. This includes the dishwasher, oven, fridge, and cabinet doors.
Pro Tip: Mark these swings on the floor with masking tape. If you place your sink in a spot where standing at it blocks the fridge from opening, you have a functional failure.
Map Traffic Flow
Stand in your kitchen and imagine making a cup of coffee. Now imagine making a three-course meal. Trace your steps. Ideally, your small house kitchen sink placement should be the pivot point. You want to be able to turn from the sink to the stove without taking more than one or two steps, but you also want enough separation so that dirty dishes aren’t splashing into your frying pan.
The Golden Rule for small spaces: Try to keep the sink within 4 to 6 feet of the stove and fridge, but never directly adjacent without a buffer zone.
Check Plumbing Constraints
This is the reality check. In a house on a slab foundation, moving a drain pipe 10 feet might cost thousands of dollars. However, shifting it 6 inches or moving it along the same wall is usually affordable.
If you are on a tight budget, your best small house kitchen sink placement is likely where the current plumbing is, or very close to it. If you are renovating a tiny house on wheels or a space with a crawlspace, you have much more flexibility to move pipes.
Use free apps like Room Planner or just graph paper to sketch this out. Once you have your map, you are ready to choose your hack.
Top 10 Small House Kitchen Sink Placement Hacks
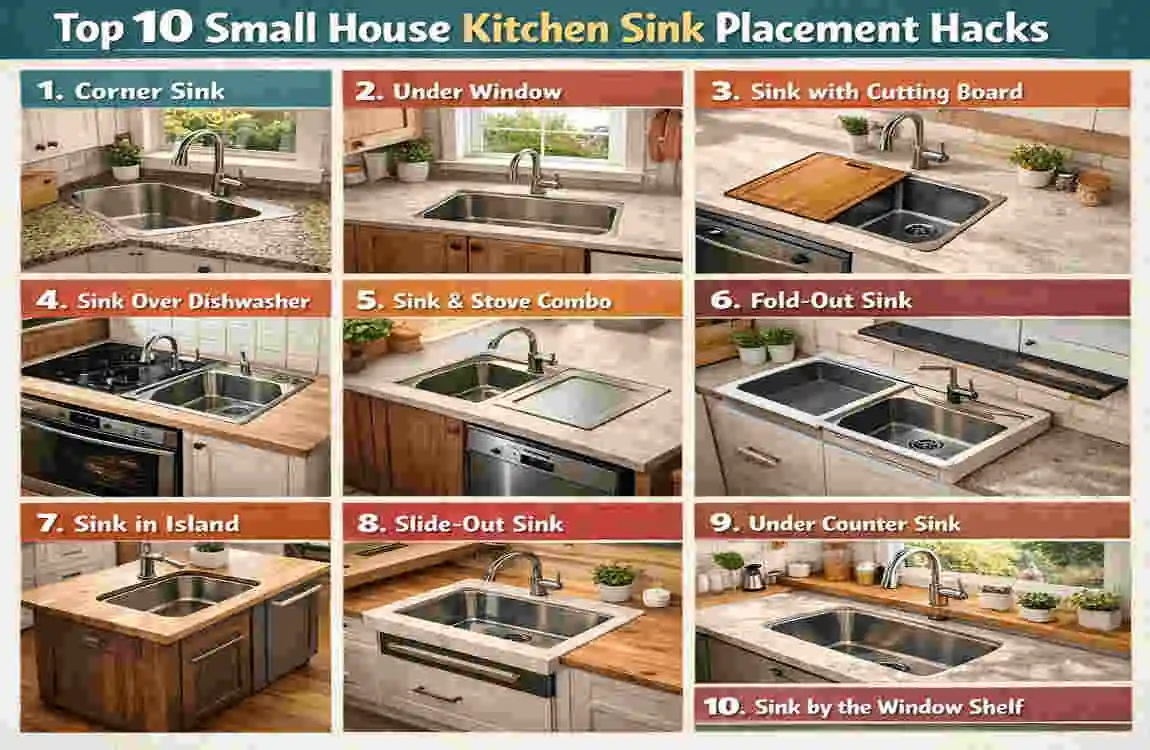
Here are 10 specific strategies to solve the puzzle of a tiny kitchen. Each of these hacks is designed to solve a specific spatial problem.
Corner Sink Magic
The corner of an L-shaped kitchen is notoriously difficult. It often becomes a “dead zone” where appliances go to die, or it houses a lazy susan that is frustrating to use.
The Hack: Move your small house kitchen sink placement directly into the corner.
Why It Works: By placing the sink in the corner, you free up the long, straight runs of the counter on either side. Instead of breaking up a 4-foot counter section with a sink in the middle, you keep that 4-foot section intact for food prep. It turns the “dead” corner into the most active spot in the kitchen.
Installation: You will need a corner sink cabinet (often diagonal). You can use a specialized corner sink (shaped like a butterfly) or a standard small round sink.
- Cost Estimate: $200-$400 for the cabinet adaptation.
- Pros: Maximizes continuous counter space; utilizes dead corners.
- Cons: Only one person can use the sink at a time; under-sink storage can be awkward.
Under-Counter Depth Sinks (The Slim Profile)
Standard sinks are usually about 22 inches deep (front-to-back). In a tiny house or a narrow galley kitchen, standard counters might take up too much floor space.
The Hack: Use an 18-inch deep sink with a narrower cabinet.
Why It Works: This allows you to shave inches off your cabinetry depth. If you have a narrow galley kitchen, saving 4 inches on cabinet depth can make the aisle feel significantly wider. A narrower kitchen sink placement means you have more floor space to walk, dance, and cook.
Installation: Look for “bar prep” sinks or custom tiny home sinks. Ensure your faucet is mounted to the side or wall to save depth.
- Cost Estimate: $150-$300.
- Pros: Increases floor space; makes narrow galleys feel wider.
- Cons: You cannot wash large baking sheets flat; requires smaller cabinets.
Wall-Mounted Floating Sinks
Who says a sink needs a cabinet underneath it? If storage isn’t your #1 priority, but visual space is, this is a game-changer.
The Hack: Install a wall-mounted sink with exposed plumbing (or a stylish shroud) and no cabinet below.
Why It Works: Being able to see the floor continuously from wall to wall tricks the eye into thinking the room is much bigger than it is. It removes the boxy cabinet’s bulk. This is a very European style of small house kitchen sink placement and is incredibly popular in modern micro-apartments.
Installation: Requires strong wall reinforcement (blocking) to support the sink’s weight plus water.
- Cost Estimate: $200-$500 (depending on sink style).
- Pros: Massive visual space expansion; wheelchair accessible; very easy to clean the floor.
- Cons: Loses under-sink storage; plumbing must look neat.
Island or Peninsula Placement
In many small open-concept homes, wall space is precious because that is where your tall cabinets and fridge need to go.
The Hack: Move the small house kitchen sink placement to a small island or a peninsula.
Why It Works: This creates a “social sink.” When you are washing dishes, you are looking out into the living room or chatting with guests, rather than staring at a wall. It frees up your back wall for floor-to-ceiling pantry storage, which is gold in a small house.
Installation: Plumbing must come up through the floor. This is harder on a concrete slab but easy with a basement or crawlspace.
- Cost Estimate: High ($500+ for plumbing relocation).
- Pros: Social interaction; frees up wall space for tall storage.
- Cons: Dirty dishes are on display in the middle of the room; requires floor plumbing.
Over-Dishwasher Drainboard Positioning
Space is tight. Sometimes you don’t have room for a sink and a separate counter section for a dishwasher.
The Hack: Use a sink with an integrated drainboard that extends over the dishwasher.
Why It Works: Usually, a dishwasher needs its own 24-inch slot, and the sink needs its own slot. By getting a sink with a large “wing” or drainboard, you can install the dishwasher right next to the sink bowl, and the drainboard covers the top of the dishwasher. This gives you a drying rack that doesn’t take up “real” counter space. It creates a seamless, watertight area.
Installation: Requires careful measurement of counter heights and appliance clearance.
- Cost Estimate: $300-$600 for the specialized sink.
- Pros: integrated drying rack; utilizes space above appliances.
- Cons: Can be hard to find the specific sink model; limits sink depth slightly.
Narrow Farmhouse Styles
Everyone loves the look of a farmhouse (apron front) sink, but they are usually massive—30 to 36 inches wide.
The Hack: Install a 20 to 24-inch “tiny” farmhouse sink.
Why It Works: You get the deep basin benefits of a farmhouse sink (great for washing big pots) without the width hogging your counter. The apron front also eliminates the need for a 3-inch strip of countertop in front of the sink, which actually saves you a bit of space and brings you closer to the work. This stylish small house kitchen sink placement makes the kitchen feel custom and high-end.
Installation: Requires a custom cabinet modification to fit the apron front.
- Cost Estimate: $250-$500.
- Pros: Ergonomic (closer to you); deep basin; beautiful aesthetic.
- Cons: Requires cabinet modification; limited width for two people.
Pull-Out or Fold-Down Sinks (The RV Secret)
Borrowing from the RV and yacht world, this is for the truly tiny spaces (like under 300 sq ft).
The Hack: Use a sink with a custom-fitted cutting board cover, or a faucet that folds down so a lid can cover the sink entirely.
Why It Works: When the sink is not in use, it disappears. It becomes countertop. This means your small house kitchen sink placement doesn’t “cost” you any counter space because it converts back into a counter when you are chopping veggies.
Installation: You can buy “workstation sinks” that come with these fitted boards, or DIY a cutting board to fit over your existing sink.
- Cost Estimate: $50-$400 (depending on whether it’s DIY or a workstation sink).
- Pros: Zero wasted space; multi-functional; hides dirty dishes.
- Cons: You have to move the cover to use the water; faucet must be compatible.
High-Low Dual Sinks
In a small kitchen, drying racks are the enemy. They take up massive amounts of space.
The Hack: A “1.5 bowl” sink or a high-low sink where one side is shallower and smaller.
Why It Works: The smaller, shallower side acts as your permanent colander and drying rack. You wash on the deep side and set items to dry on the small side. This eliminates the need for a countertop drying rack, effectively saving you 18 inches of counter space. It optimizes the placement of your small-house kitchen sink for workflow.
Installation: Standard drop-in or undermount.
- Cost Estimate: $150-$350.
- Pros: Removes clutter from counters; separates clean/dirty prep.
- Cons: The main basin is smaller than a single large sink, making it harder to wash baking sheets.
Integrated Bar Sink Placement
Who says you need a “kitchen” sink?
The Hack: Use a round or square “bar sink” (prep sink) as your main sink.
Why It Works: A standard kitchen sink is often overkill for a single person or a couple who eats simply. A 15-inch bar sink is plenty big enough to wash a plate and a pot. By downsizing the fixture itself, you gain 10+ inches of counter space. This small-house kitchen sink placement is bold yet practical for minimalists.
Installation: Very easy, fits in almost any cabinet size.
- Cost Estimate: Under $150.
- Pros: extremely cheap; saves maximum counter space.
- Cons: Not suitable for large families; cannot soak large pans.
DIY Offset Placement
This is the simplest hack on the list, requiring no special equipment.
The Hack: Do not center the sink in the cabinet or on the wall. Offset it to the left or right.
Why It Works: Aesthetics usually dictate symmetry (centering the sink under the window). But in a small house, symmetry can be wasteful. By shifting the sink 6 to 12 inches to one side, you create a single large, usable counter space instead of two small, useless zones.
Installation: Just a decision during the countertop cutting phase.
- Cost Estimate: $0.
- Pros: Free; creates usable continuous workspace.
- Cons: Might bother people who need perfect symmetry; window alignment might be off.
Budget-Friendly Materials and Fixtures for Small House Kitchen Sink Placement
Once you have decided where to put the sink, you need to decide what to buy. In small house builds, budget is often a priority. However, because the sink is small, you can sometimes afford better materials than you would in a huge kitchen.
Here is a quick breakdown of materials perfect for compact spaces:
Material Cost Estimate Durability Aesthetic Best For…
Stainless Steel $ – $$ High Modern/Industrial Almost everyone. It’s slim, light, and matches everything.
Composite Granite $$ – $$$ Very High Matte/Luxury Adding a pop of color (black/grey) and hiding water spots.
Fireclay/Ceramic $$$ Medium Farmhouse/Classic Those wanting the “tiny cottage” look. Beware of chipping.
Acrylic $ Low Plastic/Plain tightest budgets only. prone to scratching.
Brand Recommendations: For tiny sinks that don’t break the bank, look at IKEA (their Havsen and Norrsjon lines are great for small spaces). Kohler and Kraus offer excellent “workstation” sinks that are compact yet come with cutting boards, making them perfect for .
Eco-Hack: Since you are optimizing your small-house kitchen sink placement, optimize your water use too. Install a low-flow aerator on your faucet. It costs about $5 and can reduce water usage by 30%, which is crucial if your tiny house is on a tank system or you want to lower utility bills.
Real-Life Transformations: Small House Kitchen Sink Placement Before/Afters
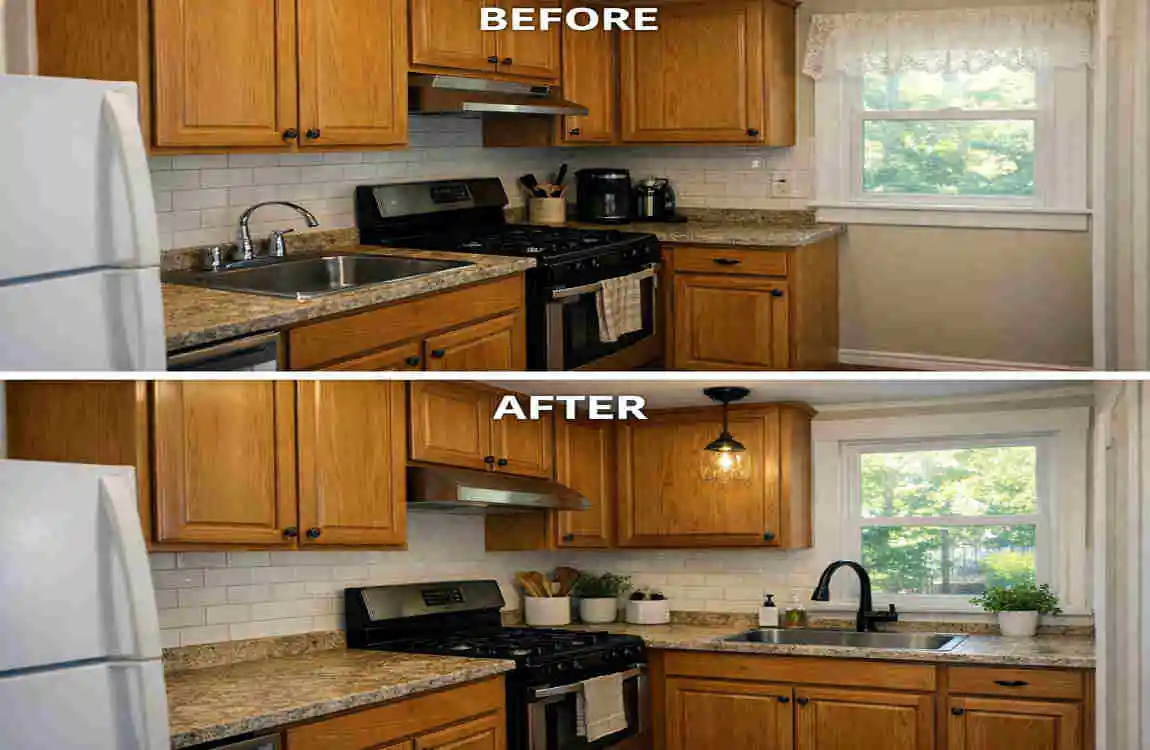
Let’s look at how these hacks play out in the real world.
The Lahore Apartment Redo A client in a tight studio apartment in Lahore had a classic problem: the sink was right next to the stove. Cooking was dangerous and cramped.
- The Change: We utilized Hack #1 (Corner Sink). We moved the plumbing three feet into the corner.
- The Result: This opened up a continuous 3-foot section of counter between the sink and stove. The client reported that meal prep time dropped, and the kitchen felt “twice as big.”
- Metric: Counter space efficiency increased by 40%.
The “Van Life” Inspiration A couple moving into a 300 sq ft accessory dwelling unit (ADU) had only one wall for the kitchen.
- The Change: They used Hack #7 (The Cover). They installed a deep, single-basin stainless sink with a custom bamboo cutting board that fit flush over the top.
- The Result: When they weren’t washing dishes, their kitchen had 6 feet of continuous counter. The sink effectively disappeared.
- Metric: Usable prep space increased by 25% compared to an open sink.
Common Mistakes to Avoid in Small House Kitchen Sink Placement
Even with the best hacks, things can go wrong. Here are the pitfalls to dodge:
- Ignoring the Dishwasher Door: Always check that you can still stand at the sink even if the dishwasher door is down. If they collide, you have created a traffic jam.
- Forgetting Lighting: You need to see what you are cleaning. If you move your small house kitchen sink placement to a corner, make sure you install under-cabinet lighting. Corners are dark!
- Oversizing the Faucet: A massive, high-arc commercial faucet looks great in a magazine, but in a tiny kitchen, it will splash water everywhere. Choose a faucet scale that matches your sink size.
- Overlooking the “Landing Zone”: You need at least 12 inches of space on one side of the sink for dirty dishes. If you don’t have this, dirty dishes will end up on the floor or the dining table.
FAQs on Small House Kitchen Sink Placement
What is the best placement for a kitchen sink in a 8×8 kitchen? For a square 8×8 kitchen, the “Corner Sink” (Hack #1) or the “L-Shape” layout usually works best. It utilizes the corner and keeps the center of the room open for movement.
How much does moving a kitchen sink cost? If you are moving it along the same wall, it might cost $200-$500 in plumbing labor. If you are moving it to an island or an opposite wall (requiring floor or ceiling pipe work), costs can exceed $1,500.
Can I move my sink without breaking walls? Yes! You can run pipes through the back of cabinets. As long as you maintain the proper “slope” for drainage (1/4 inch drop per foot), you can shift a sink several feet without opening the wall.
What is the best material for a tiny kitchen sink? Stainless steel is usually the winner. It has the thinnest rim (saving space), is durable, lighter for installation, and generally the most affordable.