


Somewhere in your house, right now, warm air you have paid for is sliding out through a gap you have stopped noticing. Historic England put the figure at 15 to 20 per cent: that is how much of an older building’s heat is lost through draughts alone, through nothing more mysterious than moving air. The good news is that almost every leak can be found in an evening, and most individual fixes cost less than a takeaway (a letterbox brush is about £7.50, a chimney balloon under £20). Here is the full walk-round, room by room.
Fifteen to twenty per cent of an older home’s heat leaves as moving air — through gaps, not glass.
Find Them First: The Ten-Minute Draught Hunt
Pick a cold, windy evening, because that is when the house is leaking hardest, and do a slow lap of it. The Energy Saving Trust’s method needs no kit at all: look for slivers of daylight, or lamplight from the next room, showing under and around doors and windows; listen for rattles and whistling; watch for curtains that stir when everything is shut; and feel for moving air with the back of your hand around doors, windows, floorboards, skirting boards, pipework, the staircase and the fireplace. The back of a hand is surprisingly sensitive to a draught, and a slightly damp one more so.
Where a room feels cold but you cannot pin down why, smoke will tell you. An incense stick from the back of the kitchen drawer works well: hold it near the suspects and watch which way the ribbon leans. The professional version, a smoke pencil that puffs out harmless glycerine vapour on the pull of a trigger, costs just over £50.
For the full detective experience, many councils now lend thermal imaging cameras free of charge through their public libraries; in Somerset, for example, any library member can borrow one for three days and watch the cold spots glow on screen. However you hunt, your hit list will feature the suspects the Energy Saving Trust’s technical guidance names again and again: windows, external doors, the open chimney, the loft hatch, gaps in and around timber floors, the letterbox, and the assorted holes drilled for pipes and cables over the decades. Which is, conveniently, the route this article takes from here.
Windows: Where the Cold Slips Through the Gaps
Start with the windows, because the numbers say to. Historic England estimate that about one-fifth of a home’s heating escapes through its windows, and here is the part most people get backwards: the majority of that warmth leaves as air slipping through gaps, not as heat passing through the glass. Less than a quarter of a traditional window’s heat loss is conduction through the pane. Cold glass gets the blame; moving air does the damage. That ordering matters: the cheap fix, sealing the gaps, comes before the expensive one, changing the glass.
If you have sliding sash windows, they leak for an honourable reason: they are machines, and machines need clearance. Each sash must slide freely in its channel, so nothing can grip it tightly. That leaves gaps at the top of the upper sash, at the bottom of the lower one, along every sliding edge, and at the meeting rail, the place in the middle where the two sashes overlap and, in a worn window, rattle against one another. On a windy night a Victorian sash can whistle in three-part harmony.
Before any seal goes near them, get the windows working properly, because repair alone buys a lot. Historic England note that simply easing and overhauling a sash window (freeing sashes that have been painted shut, renewing worn cords, refixing loose beading) can cut air infiltration by up to a third. A sash that closes squarely and sits snugly in its frame has already lost most of its rattle.
Then comes the sealing, and a single distinction does all the work: parts that slide need brush seals, and parts that press shut can take squashy ones. A brush seal is a fine strip of pile that a sash can glide across without jamming; a squashy foam or rubber seal only works where two surfaces close against each other and compress it. Stick-on foam fails on a sash because the sliding action simply shears it away, and the Energy Saving Trust say so plainly: “For sliding sash windows, foam strips do not work well.” Their advice is brush strips, or a professional. Done thoroughly, the professional version means lifting the sashes out and fitting brush seals discreetly into the window, joinery rather than a Saturday job, and Historic England cite research showing that draught-proofing a sash in good condition can cut air leakage through it by as much as 86 per cent. Note the wording carefully: that is air leakage, not your heating bill. But on a February evening it is the sort of difference you feel in your shoulders.
Hinged casement windows and most modern designs are far simpler, because they close by pressing against the frame, which is precisely what squashy seals are for. Clean the frame, cut self-adhesive foam or rubber strip to length, fit it where the casement lands, and you are done for a few pounds a window. If a casement has dropped on its hinges and no longer closes square, sort that first; no strip can seal a crooked closer.
Once the gaps are sealed, the glass itself becomes the biggest remaining loss. If a room still feels cold after that, slim double-glazed units can be fitted into the original sashes without changing the look from the street; this guide explains what that work involves.
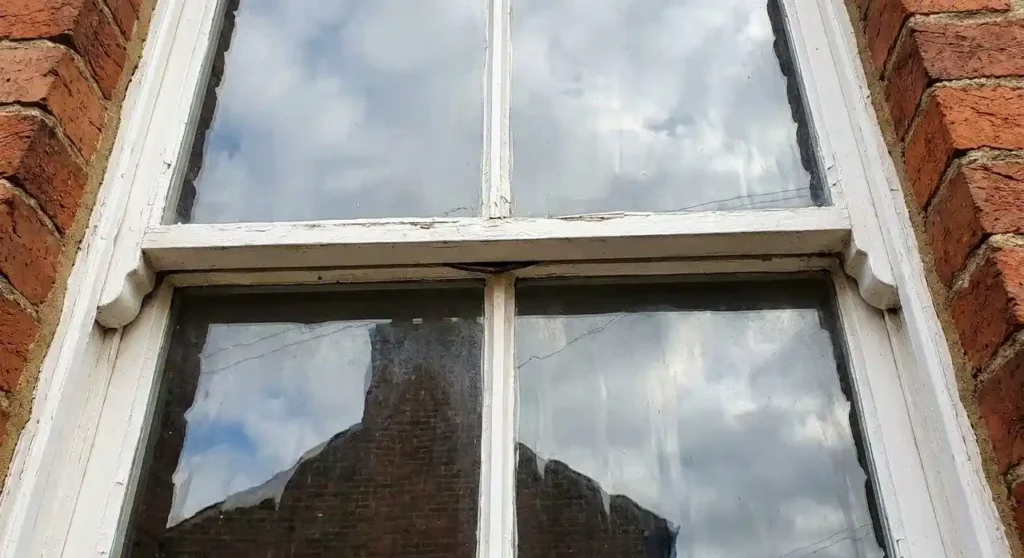 The meeting rail — where the two sashes overlap — is where a worn sash whistles first.
Doors: The Letterbox, the Keyhole and the Gap Underneath
An external door hides four draughts in one slab of timber: the letterbox, the keyhole, the gap underneath and the gap around the edge. The letterbox is the easiest win in the whole house. A brush cover, two rows of bristles that part for the post and close behind it, screws over the inside of the slot and costs about £7.50 from the big DIY retailers. While you are kneeling there, look at the keyhole: a swinging keyhole cover blocks a small but bitter jet of air and costs very little.
The gap under the door takes a brush strip: a metre length, screwed along the bottom edge so the bristles just kiss the floor, costs about £7 and fits with a hacksaw and four screws. Around the edge, self-adhesive foam or rubber strip on the frame does the job, since a closing door compresses a seal just as a casement window does. A five-pack of metre-long strips sold for doors, windows and loft hatches, sealing gaps of one to six millimetres, costs about £10 and covers several other jobs below.
Internal doors are the exception, and it catches people out: do not seal them. The Energy Saving Trust are clear that the gap beneath an internal door exists to let air move around the house, and the Centre for Sustainable Energy adds that those undercuts provide the cross-flow that keeps moisture from building up in closed rooms. If the sitting-room door breathes cold onto your ankles in the evening, use a fabric draught excluder you can kick aside, the classic sausage dog, and give the house its airflow back at bedtime.
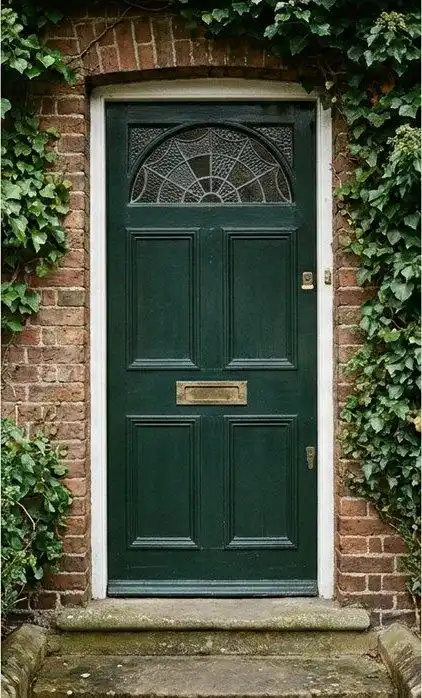
One slab of timber, four draughts: letterbox, keyhole, the gap beneath and the gap around the edge.
Floors and Skirting: The Draught Around Your Ankles
That particular cold-ankle feeling in an older living room usually comes from below. Government best-practice guidance on floor retrofits notes that around 10 to 20 per cent of a building’s heat loss can be through the floors where they are not insulated to a reasonable standard, and suspended timber floors, boards laid across joists with a ventilated void beneath, are the classic offender. The same guidance points out that many traditional floors were never tongue-and-groove, so the boards carry open gaps that increase air leakage significantly even when the floor is in good repair. There is even a tell-tale sign: cold air filtering up through the gap behind the skirting gradually stains the carpet in a dark line along the wall.
The fix is quietly satisfying. For the gaps between boards, use a compressible filler strip made for the purpose: a soft bead you press down between the boards with a scraper, where it grips, squashes and recovers as the timber moves with the seasons. The strips come in profiles for gaps from under 3mm up to 11mm, priced from about £10.50 for a 10-metre roll to about £34.50 for a 40-metre roll. Measure before you buy: filling every gap in an average room can take two to three rolls, though most rooms only need the worst runs treated. The junction where skirting meets floor takes a bead of flexible decorator’s filler rather than anything rigid.
One rule here is non-negotiable. The void under a suspended floor must keep breathing: air is meant to flow beneath the boards through airbricks or grilles set in opposite outside walls, and that cross-draught is what keeps the joists dry and free of rot. Seal the gaps on the room side as thoroughly as you like, and never block the airbricks themselves. If yours are clogged with soil, paint or leaves, clearing them out is part of the weekend’s work, not a job to skip.
The Chimney: A Hole in the Roof You’ve Stopped Noticing
An open chimney over an unused fireplace is doing exactly what it was built to do: drawing the warm air out of the room, day and night, fire or no fire. The Energy Saving Trust put the saving from draught-proofing an unused chimney at about £45 a year in Great Britain, or around £60 in Northern Ireland.
Two removable devices dominate here, and both cost under £25. An inflatable chimney balloon, about £18 in the common medium size, wedges into the flue just above the fireplace; it has a built-in vent that still lets through a small amount of air, roughly 13 per cent, so the flue above does not turn damp, and it comes with a bright reminder tag for a serious reason: it must come out before any fire is lit. The alternative is a thick plug of felted wool, about £24 for the standard 12-inch round flue, which pushes up into place and pulls out just as easily. Whichever you choose, never seal a flue completely airtight; that trickle of airflow is what keeps it dry.
If the fireplace is permanently retired, a ventilated cap fitted over the chimney pot finishes the job from the top. Usually terracotta, the vented design keeps out rain and birds while still letting the flue breathe, which matters all the more if the bottom is plugged as well, and the Energy Saving Trust put prices at around £150 upwards. And if any fireplace in the house still works, or the room holds a stove or a boiler that takes its air from the room, put the sealant down and read the ventilation section below before touching a thing.
The Loft Hatch: The Five-Minute Fix Most Homes Miss
Warm air rises, which makes the loft hatch a trapdoor in your heating budget: a loose square of board sitting between the warmest air in the house and the coldest space in it. Gaps around loft hatches appear on the Energy Saving Trust’s list of common leakage paths, yet this is the job most homes never get round to.
The fix takes five minutes and the leftovers from the door job. Stick compression strip around the rim the hatch closes onto; a couple of pounds’ worth from the same five-pack of strips used on the doors will do it. Check the catch pulls the hatch down firmly onto the strip rather than leaving it resting under its own weight. And if the top of the hatch is bare board, fix a slab of insulation to it, so it stops being the one cold tile in an otherwise warm ceiling.
Pipes, Cables and Odd Holes: Behind the Kitchen Cupboards and Under the Sink
Every service that enters your house came in through a hole, and hardly any of the holes were sealed properly afterwards. The Energy Saving Trust’s technical guidance lists them among the usual leakage paths: gaps around waste pipes behind the kitchen units and under the sink, boiler pipework, television and broadband cables through the wall, and gaps around electrical fittings in hollow walls. Older homes add their own archaeology, from vent holes left by long-gone gas appliances to the hole an aerial cable used in 1987.
Take a torch and open the cupboards along the outside walls: the gap around a waste pipe is often big enough to see daylight through. Small gaps take flexible sealant; larger ones take expanding foam, trimmed flush once it has cured; a pipe collar tidies the finish wherever a pipe passes through a visible wall. None of it costs more than a few pounds, and behind-cupboard gaps explain many a mysteriously cold kitchen floor.
What Not to Seal: Your House Still Needs to Breathe
Before the sealant gun gets carried away, a reset: an older house needs to breathe. Historic England’s guidance is that older buildings should keep background ventilation of roughly 0.4 to 0.8 air changes an hour, and the point of draught-proofing is to swap uncontrolled leakage for controlled ventilation, not to shrink-wrap the building. Most draughty old houses sit so far above that band that everything in this article still leaves a healthy margin. But some things must stay open.
Never block airbricks or sub-floor vents, ventilation into the roof space, trickle vents in window frames, extractor fans, or any vent in a room containing an open fire, a stove or a boiler that draws its air from the room. The last of those is the serious one. The building regulations require such rooms to have permanently open air vents sized to the appliance; an open fire, for example, needs venting equal to at least half the area of its throat opening. Draught-proofing a room like that without specialist advice is not an energy project, it is a safety risk, so bring in a professional first.
Two quieter cautions from Historic England. Do not seal up damp cellars or voids, which need airflow to dry out. And if a window already has secondary glazing, a separate pane fitted on the room side, do not also draught-proof the original window behind it, because moisture then gets trapped between the two. Finally, if condensation appears somewhere after your sealing weekend, the answer is to add controlled ventilation, an extractor fan, a trickle vent, an opened window, rather than to strip the seals back out.
A Weekend Plan and What You’ll Save
Ranked by effort against reward, the order of attack writes itself. Saturday morning: the chimney balloon, which takes minutes and changes how the room feels by lunchtime, then the letterbox brush and the front-door strips. Saturday afternoon: the loft hatch, followed by a torch-lit tour of the kitchen pipework with sealant and foam. Sunday: floorboard filler in the worst room, slow but oddly meditative work. Windows come last, not because they matter least but because they need the most judgement: casements are a same-day DIY job, while sashes deserve an overhaul first and brush seals fitted properly, which for most people means a specialist.
The whole DIY kit (strips, brushes, balloon, filler and foam) lands somewhere between £50 and £100 for a typical house. Against that, the Energy Saving Trust’s current figures say draught-proofing windows, floors and doors saves around £55 a year in Great Britain, or about £80 in Northern Ireland, with an unused chimney adding roughly £45 more. Treat those as combined, whole-house figures rather than per-window promises, and remember what they cannot measure: a draught-free room stops feeling cold at the same thermostat setting, and comfort is why most people are glad they gave up the weekend.
If you would rather hand it all over, the Energy Saving Trust put professional draught-proofing of a house’s windows and doors with standard strips at around £250. Specialist sash-window sealing, with the sashes removed and brush seals built in, is a different and more involved service, so make sure any quote states which of the two it is pricing. And for a house that stays stubbornly cold after everything, a professional air-leakage audit exists: a fan is sealed into a doorway to gently pressurise the house while smoke pencils trace every remaining leak, a method described in the Energy Saving Trust’s technical guidance. Most homes never need it. Most homes need a windy evening, an incense stick and a list.
Frequently asked questions
Do foam draught excluder strips work on sash windows? No. The Energy Saving Trust’s advice is that foam strips do not work well on sliding sash windows, and that brush strips, or a professional, are the answer. The reason is mechanical: foam is a squashy seal that needs two surfaces pressing together, and a sliding sash shears it off instead. Save the foam for hinged casements and door frames, where surfaces close against each other, and give sliding edges a brush seal they can glide across.
Should I block up my chimney if I never use the fireplace? Yes, with a removable device rather than a permanent seal. The Energy Saving Trust put the saving at around £45 a year in Great Britain, or about £60 in Northern Ireland. A chimney balloon costs about £18 and a wool flue plug about £24; both leave a little airflow so the flue stays dry, and both must come out before any fire is lit. If the room has a working fire, stove or open-flued boiler, get specialist advice before sealing anything.
How much money does draught proofing really save? Around £55 a year in Great Britain for windows, floors and doors combined, on the Energy Saving Trust’s current figures, plus about £45 for an unused chimney; in Northern Ireland the equivalents are roughly £80 and £60. Note the scope: the £55 covers windows, floors and doors together, so any claim of £55 from windows alone is misreading it. The bigger, unmeasured return is comfort, since a sealed room stops feeling cold at the same temperature.
Can you draught proof a house too much and cause damp? It is possible, but rare in older housing. Historic England recommend background ventilation of 0.4 to 0.8 air changes an hour for older buildings and note that most leaky old homes sit well above that, so normal draught-proofing helps rather than harms. The genuine no-go areas are rooms with open-flued fires, stoves or boilers, sub-floor and roof-space vents, and damp cellars. If condensation appears after sealing, add controlled ventilation rather than removing the seals.
Is there VAT relief on draught proofing? Yes. Professionally installed draught stripping counts as an energy-saving material and is zero-rated for VAT until 31 March 2027. The relief applies to supply-and-fit work by a contractor, not to materials you buy yourself at the shop, and it does not extend to associated repairs: sash cord renewal, rot repair and redecoration are charged at the standard 20 per cent. A mixed sash-overhaul invoice can therefore legitimately show two different VAT rates.
