
There is nothing quite like that sinking feeling you get when you walk out to your backyard oasis, ready for a morning swim, only to find the water level has dropped significantly. You check the sky—no rain recently. You check the calendar—you haven’t backwashed the filter in weeks. Yet, the water is vanishing.
If you are constantly dragging the hose over to refill the pool and watching your water bill climb, you are likely dealing with a leak. It is a frustrating scenario that costs homeowners hundreds of dollars a year in wasted water and chemicals. According to the Pool & Hot Tub Alliance, even a minor leak can waste a quarter-inch of water daily. That adds up to thousands of gallons over a summer!
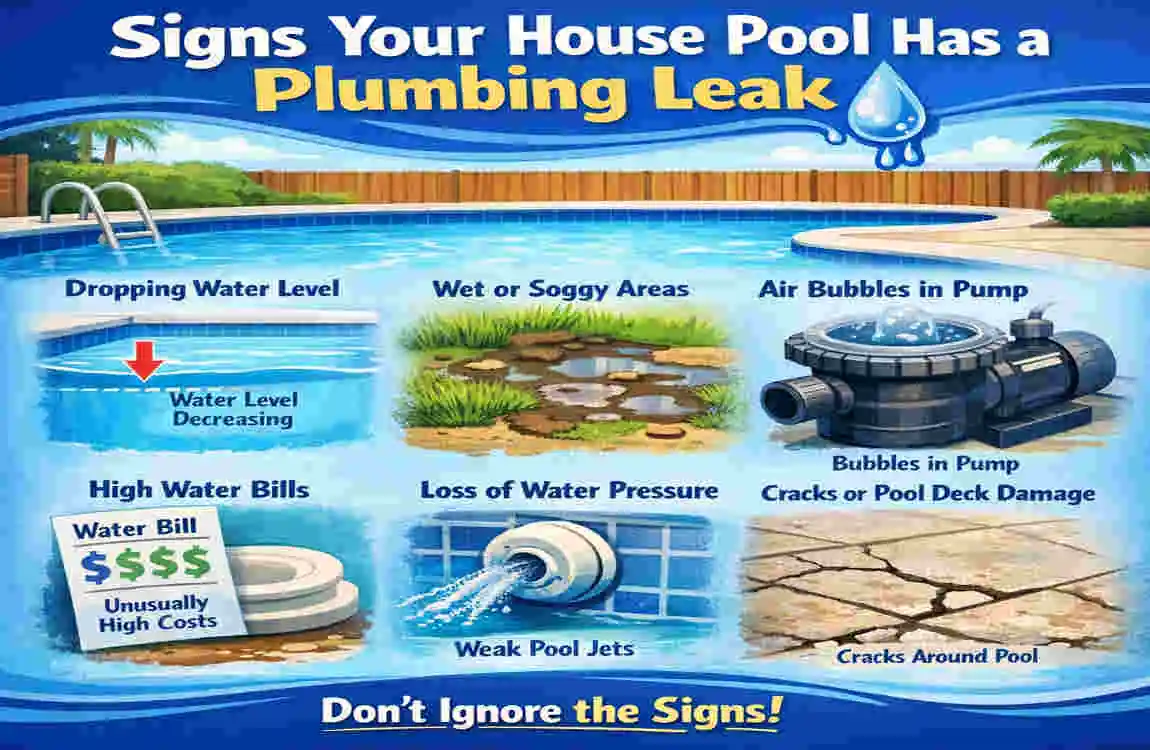
Signs Your House Pool Has a Plumbing Leak
Before we start grabbing buckets and food coloring, we need to confirm that you actually have a leak. Sometimes, the hot summer sun can trick us. Evaporation is natural, but plumbing leaks have very specific personalities. If you know what to look for, you can catch the problem before it causes structural damage or creates a sinkhole in your yard.
Here are the major red flags that suggest you need to investigate further:
Significant Water Level Drop
The most obvious sign is a water line that recedes faster than a receding hairline. While evaporation can take about 1/4 inch of water per day depending on humidity and wind, anything more than that is suspicious. If you are losing an inch or more in a 24-hour period, you have a leak.
Squishy or Wet Soil
Take a walk around your pool equipment pad and the path where your underground pipes likely run. Is the grass unusually green in one spot? Is the soil mushy or muddy even though it hasn’t rained? Leaking return lines or suction pipes often saturate the ground around them.
Air Bubbles in the Return Jets
Look at the jets shooting water back into the pool. If you see a constant stream of champagne-like bubbles, or if the water is sputtering, it means air is getting into the system. This usually points to a suction-side leak (before the water hits the pump).
The Pump is “Gurgling“
Your pool pump should hum consistently. If it sounds like it is gargling rocks or struggling to keep prime (stay full of water), it is sucking air through a crack or a loose seal.
Cracks in the Deck or Bond Beam
If water is leaking behind the pool wall, it can wash away the dirt supporting your concrete deck. Eventually, the deck settles and cracks. If you see shifting concrete, this is a serious sign of a long-term leak.
Chemical Imbalance and Algae
Are you pouring gallons of chlorine in, but your test strips still show zero? When water leaks out, your expensive chemicals go with it. To make matters worse, fresh water (which has no chemicals) is constantly being added to top it off, diluting your sanitizer and inviting algae.
Why Early Detection Matters: Ignoring these signs isn’t just annoying; it’s dangerous for your home. Water is a powerful force. A small leak can erode the soil foundation under your pool or house, leading to repairs that cost upwards of $2,000 to $5,000. Catching it now means you might only spend $20 on a tube of epoxy.
The Bucket Test for Surface-Level Pool Leaks
If you aren’t sure if your water loss is due to the sun or a crack, the “Bucket Test” is the gold standard of DIY pool diagnostics. It is incredibly simple, costs nothing, and uses basic physics to give you a definitive answer.
This method works by comparing the water loss in your pool to the water loss in a controlled environment (the bucket). Since both are exposed to the same sun and wind, they should evaporate at the same rate. If the pool drops faster than the bucket, you have a leak.
Step-by-Step Guide to the Bucket Test
- Bring the Water to Normal Level: Before starting, fill your pool to its standard operating level (usually halfway up the skimmer opening). You want the conditions to be normal.
- Turn Off the Auto-Fill: If you have an automatic leveling device that adds water when it gets low, shut it off. This will ruin the test if left on.
- Fill the Bucket: Take a standard 5-gallon plastic bucket. Fill it with pool water until it is about two-thirds full.
- Place the Bucket: Set the bucket on the first or second step of your pool. This is a crucial detail. By keeping the bucket partially submerged in the pool water, you ensure the water inside the bucket stays the same temperature as the pool water. This equalizes the evaporation rate.
- Mark the Water Levels:Inside: Use a piece of electrical tape or a permanent marker to mark the water level inside the bucket.
- Outside: Use tape or a marker on the outside of the bucket to mark the pool’s water level.
- Wait 24 Hours: Do not touch the pool. No swimming, no splashing, and try to pick a day when it isn’t raining. You need a full 24-hour cycle to get accurate data.
- Compare the Results: Come back the next day and look at your marks.
- Scenario A: Both the pool water and the bucket water have dropped the same distance from the tape. Verdict: Evaporation. You are safe!
- Scenario B: The pool water level has dropped more than the water inside the bucket. Verdict: You have a leak.
Troubleshooting Your Results
Be mindful of “splash-out.” If your dog jumped in the pool or the kids had a cannonball contest, the test is void. Also, if it rained heavily, the bucket might fill up differently than the pool, depending on the surface area, though rain usually affects both equally.
Pro Tip: If the bucket test confirms a leak, you now know the “what.” Next, we need to find the “where.” This leads us to our next method.
Dye Trick to Pinpoint Exact Leak Location

Now that we know there is a leak, we have to find the specific hole. This is where the “Dye Trick” comes in. It is surprisingly fun—almost like a science experiment—and is the most effective way to see invisible currents underwater.
The concept is simple: you squirt a concentrated cloud of color near a suspected leak. If there is a hole, the water is rushing out of it. That current will grab the dye and suck it right into the crack, visibly pointing out the damage.
How to Execute the Dye Test Like a Pro
- Get Your Supplies: You can buy a professional “Pool Leak Detection Syringe” online for about $10, which usually contains a thick, dark purple or red dye. However, in a pinch, regular dark red food colouring works well, though it dissipates more quickly. You will also need a pair of goggles.
- Turn EVERYTHING Off: This is the most critical step. Turn off your pump, filter, waterfalls, and auto-cleaners. You need the water to be dead still. If the water is moving, the dye will blow away, and you won’t see anything.
- Wait for the Water to Calm: Give the pool about 10 to 15 minutes after shutting off the pump so the currents settle.
- Identify Suspect Areas: You aren’t going to dye the whole pool. Focus on the “usual suspects”:
- Around the plastic faceplate of the skimmer.
- Inside the skimmer box.
- Around the return jets (eyeballs).
- around the main drain (if you can dive that deep).
- Any visible cracks in the plaster or vinyl liner.
- Steps and light fixtures.
- Inject the Dye:Put on your goggles and stick your head underwater.
- Bring the syringe or squirt bottle close to the suspected crack (within an inch).
- Gently squeeze a small puff of dye. Do not blast it; just a small cloud.
- Watch the Movement: If the dye lazily floats around and eventually dissipates, there is no leak.
- If the dye is suddenly sucked into a line or crack like smoke being pulled into a vacuum, you found it!
- Mark the Spot: Once you see the dye get sucked in, mark that spot with a piece of tape on the deck above it so you don’t lose track of it.
Safety and Tips
Don’t worry about the dye staining your pool water permanently. The amount used is so small compared to the thousands of gallons in your pool that the chlorine will bleach it out within an hour or two. Just be careful not to squirt it directly on your swim trunks!
Advanced DIY Detection: Pressure Testing Plumbing Lines
If the bucket test says “Leak” but the dye test shows nothing in the pool shell, the problem is likely underground in the pipes. This is where things get more technical. The leak is hidden inside the PVC pipes buried beneath your deck or yard.
To find these, you need to perform a pressure test. This involves plugging up the pipes and pushing air into them to see if they hold pressure.
The Basic Pressure Test Process
Note: This requires a “pressure testing plug” (available at hardware stores) and an air compressor or even a bicycle pump for smaller lines.
- Shut Down the System: Turn off all power to the pool equipment.
- Isolate the Lines: Test one section at a time (e.g., just the suction line or just the return line). You will need to use expansion plugs (rubber plugs with wing nuts) to block off the holes in the skimmer and the return jets inside the pool.
- Hook Up the Pressure Tester: On your pump system, you will need to cut a pipe or use a drain plug adapter to attach your pressure testing rig (which has a gauge and an air valve).
- Pressurize: Slowly add air to the line. You usually only need about 10 to 15 PSI (Pounds per Square Inch). Do not over-pressurize, or you might burst a pipe that wasn’t broken!
- Watch the Gauge:If the needle stays steady for 10 minutes, that pipe is sound.
- If the needle slowly drops, air is escaping. You have an underground plumbing leak.
- Listen for Hissing: If the pressure is dropping, walk around the yard where the pipes run. Listen for a hissing sound or look for wet spots bubbling up from the ground.
This method confirms which pipe is broken (suction vs. return), which saves a lot of time if you eventually have to hire a dig crew.
Common House Pool Plumbing Leak Locations & Causes
Understanding the anatomy of your pool helps you guess where the leak is likely hiding. In my experience, 90% of leaks happen in a few specific “weak spots.”
Here is a breakdown of where to look and what usually causes the failure:
The Skimmer Throat:The Issue: The skimmer is encased in concrete, but the pool moves and settles. The plastic skimmer often pulls away from the concrete pool wall.
Return Jet Fittings:The Issue: The “eyeballs” where water shoots back in are screwed into the wall. Over time, water vibration loosens the gasket behind the wall fitting.
The Fix: Tightening the faceplate or replacing the gasket.
The Main Drain: The Issue: Located at the deepest point, hydrostatic pressure (groundwater pushing up) can crack the area around the drain, or a pebble can get stuck open the hydrostatic relief valve.
The Fix: Requires diving gear or draining the pool (risky!).
Equipment Pad (Pump & Filter): The Issue: A puddle under the pump usually indicates the shaft seal is gone. A puddle under the filter often means the belly band O-ring is dried out.
The Fix: Simple part replacement.
Underground PVC Pipes:The Issue: Tree roots growing into pipes, shifting soil snapping a joint, or poor initial gluing during construction.
- The Fix: Digging up the pipe and replacing the section.
Industry Stat: According to leak-detection experts, nearly 30% of all pool leaks originate at the return fittings due to constant vibration and pressure from the pump.
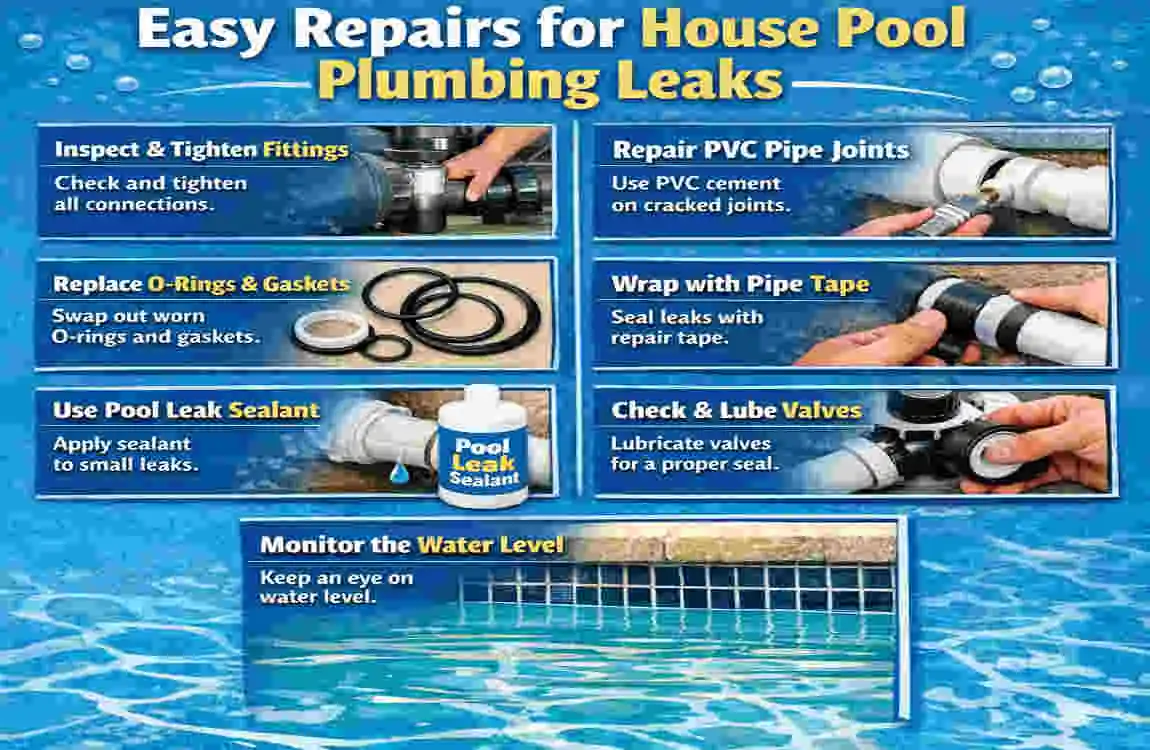
Easy Repairs for House Pool Plumbing Leaks
So, you have used the dye trick or the bucket test and found the culprit. Great job! Now, let’s fix it. Many of these repairs are surprisingly easy and can be done on a Saturday afternoon.
Fixing the Skimmer Crack (The Putty Fix)
If your dye test showed water getting sucked into a crack in the plastic skimmer body:
- Tool: A stick of two-part underwater epoxy putty ($10).
- Process: Cut a piece of the putty. Knead it between your fingers until the two colours fully blend and it turns white/grey. Roll it into a “snake.” Dive down (or reach in) and press the putty firmly into the crack. Smooth it out with your thumb. It hardens underwater in 20 minutes.
Replacing the Pump Shaft Seal
If there is water dripping between the motor and the plastic pump housing:
- Tool: Shaft seal kit ($15-$30) and a wrench.
- Process: Turn off the power. Unbolt the motor from the pump housing. Remove the impeller. Slide the old seal off (it comes in two parts: a spring side and a ceramic side). Slide the new ones on, being careful not to touch the ceramic face with greasy fingers. Reassemble. This stops that annoying drip instantly.
Tightening or Sealing Return Jets
If the dye was sucked in around the return jet:
- Tool: Screwdriver and, if needed, silicone sealer.
- Process: Unscrew the faceplate ring. Check the gasket/O-ring behind it. If it looks rotted, replace it. If the leak is in the threads, unscrew the fitting, apply pipe thread sealant (safe for plastics), and screw it back in tightly.
Patching a Vinyl Liner
If you have a vinyl pool and found a tear:
- Tool: Vinyl patch kit ($15).
- Process: Clean the area around the tear. Cut a circle of patch material (circles are better than squares; corners peel up). Apply the glue to the patch. Fold the patch in half (glue side in) to take it underwater. Unfold it over the tear and press flat, working out all air bubbles.
DIY Repair Tools & Cost Checklist
Repair Type Essential Tools Estimated DIY Cost Professional Cost Difficulty
Skimmer Crack Epoxy Putty $10 – $15 $150+ Easy
Pump Seal Wrench, Seal Kit $20 – $40 $200+ Moderate
Vinyl Patch Patch Kit, Glue $15 – $25 $150+ Easy
Pipe Glue PVC Primer/Cement $15 $300+ Moderate
O-Ring Swap Lube, New O-Ring $5 – $10 $100 (Service Call) Very Easy
Prevention Tips to Avoid Future Pool Plumbing Leaks
The best way to fix a leak is to never have one in the first place. While you can’t prevent everything, you can significantly lower your risk with these habits:
- Winterize Properly: The #1 cause of cracked pipes is freezing water. If you live in a cold climate, you must blow out your lines with an air compressor and plug them before the first freeze. Water expands when it freezes and will shatter PVC like glass.
- Keep Chemistry Balanced: Low pH (acidic water) eats away at rubber O-rings, pump seals, and even copper heat exchangers in heaters. Keep your pH between 7.4 and 7.6.
- Maintain Water Level: Don’t let the water level drop below the skimmer intake while the pump is running. If the pump sucks air for too long, it overheats, melting the plumbing fittings attached to it.
- Monitor Vegetation: Keep aggressive root systems (like Ficus or Willow trees) far away from your pool plumbing lines.
When to Call a Pool Leak Professional
I am a huge advocate for DIY, but there are times when you need to throw in the towel and call the cavalry.
You should hire a professional if:
- The Leak is Under the Concrete Deck: If the pressure test fails but you can’t see the leak, it’s likely under the concrete. Pros use sonic listening devices to detect the leak through the stone, so they know exactly where to cut the concrete.
- Structural Cracks: If the shell of your gunite pool has a massive crack running down the wall, epoxy won’t hold it. You need structural staples and professional resurfacing.
- Complex Suction Problems: If you have tried everything and the pump still won’t prime, the leak might be deep underground in the suction side, which is notoriously hard to find without gas testing.
Expect to pay between $300 and $500 for a professional leak detection service, plus the cost of repairs. It is an investment, but it saves you from digging up your entire yard without thinking.
FAQs: How to Find Leak in House Pool Plumbing
Q: How much water loss is normal in a pool per day?A: Typically, evaporation accounts for about 1/8 to 1/4 inch of water loss per day. This varies based on wind, humidity, and pool temperature. Anything over 1/4 inch consistently usually indicates a leak.
Q: Can I do the bucket test while it is raining?A: No. Rain will add water to both the bucket and the pool, but potentially at different rates depending on run-off from your deck. It is best to wait for a clear 24-hour window.
Q: Does the dye test work in salt water pools?A: Absolutely. The dye trick works the same way regardless of whether your pool is chlorine, saltwater, or fresh water.
Q: How long does pool putty last?A: A good application of underwater epoxy putty can last for years. However, it is considered a temporary-to-semi-permanent fix. Eventually, the pool may need professional plaster repair.
Q: My pump is making a loud screeching noise. Is that a leak?A: That is likely bad bearings in the motor, often caused by a seal leak. If water leaks from the pump seal, it can rust the motor bearings. You will need to replace the motor and the seal.