
Is your bathroom sounding more like an airport runway than a relaxing spa retreat lately? Or maybe you’ve noticed that after a hot shower, the mirror stays foggy for way too long, and the air feels heavy and damp. If your Panasonic house bathroom fan is humming louder than usual, pushing out musty air, or looking a bit fuzzy with grey dust, don’t panic. You are definitely not alone. In fact, dirty exhaust fans affect roughly 70% of households, simply because they are “out of sight, out of mind” until they start making noise.
We often scrub the tiles and shine the sink, but looking up at the ceiling is easy to forget. However, understanding how to clean Panasonic house bathroom fan units is one of the most impactful 30-minute DIY tasks you can do for your home. It isn’t just about aesthetics; a clean fan boosts your indoor air quality, aggressively prevents mold growth, and significantly extends the life of the fan’s motor.
Why Clean Your Panasonic House Bathroom Fan Regularly?

You might be asking yourself, “Does it really matter if there is a little dust up there?” The short answer is: yes, absolutely. Ignoring your bathroom fan can lead to a domino effect of issues in your home. Let’s break down exactly why you need to prioritize this chore.
The Invisible Health Risks
The primary job of your Panasonic fan is to remove moisture. When the grille and blades get clogged with dust, the fan cannot pull air effectively. This leaves moisture trapped in your bathroom. High humidity is the perfect breeding ground for mold and mildew.
Mold loves damp drywall and grout. Once it starts growing, it releases spores that can irritate allergies, cause asthma flare-ups, and create a generally unhealthy environment for your family. By the time you see the mold on the ceiling, the problem is usually severe. Regular cleaning keeps the humidity down and the mold away.
Performance and Efficiency Drops
Panasonic fans, especially the “Whisper” series, are engineering marvels designed to be quiet and efficient. However, they rely on precision airflow. According to EPA guidelines, dirty fans can lose up to 40% of their efficiency.
Think of it like trying to breathe through a thick wool scarf. The motor has to work twice as hard to push air through layers of grime and grease (especially if you use hairspray or heavy conditioners). This extra strain causes the motor to overheat, which can eventually lead to total failure. Cleaning the fan restores that effortless airflow and keeps your energy bills in check.
Recognizing the Signs
How do you know it’s time? Your fan will tell you.
- The Sound: If your once-silent Panasonic fan now rattles or hums loudly, the fan blades are likely unbalanced due to dust buildup.
- The Smell: Lingering odors or a persistent musty smell indicate the bad air isn’t escaping.
- The Sight: If you can see grey “fur” hanging from the slats of the cover, the inside is likely much worse.
Frequency Matters
For most homes, a deep clean every 3 to 6 months is ideal. However, if you live in a region with high humidity—like Lahore or Florida—or if you have a large family taking multiple showers a day, you might want to check it each season.
Tools and Materials You’ll Need
The good news is that learning how to clean Panasonic house bathroom fan parts doesn’t require expensive equipment. You likely have almost everything you need in your utility closet right now. You can complete this entire project for under $20 if you need to buy supplies, but usually, it’s free!
Here is your essential checklist:
- Screwdriver Set: You will mostly need a Phillips head (the cross shape), but keep a flathead handy just in case your model uses different clips or screws.
- Vacuum Cleaner: A vacuum with a hose attachment and a brush tool is your best friend here. It sucks up the bulk of the mess before you even start wiping.
- Microfiber Cloths: Essential because they trap dust rather than spreading it around.
- Mild Soap or Detergent: A little bit of Dawn dish soap works wonders on grease.
- White Vinegar: Create a 50/50 mix with water. This cuts through hairspray residue and kills surface mold spores.
- A Can of Compressed Air: This helps blow dust out of the motor crevices that your fingers can’t reach.
- A Sturdy Ladder or Step Stool: Safety first! Don’t balance on the edge of the bathtub.
- An Old Toothbrush: Perfect for scrubbing the angle of the fan blades.
Budget Breakdown:
Tool Estimated Cost Notes
Screwdriver $0 – $5 Household staple.
Microfiber Cloths $0 – $3 Washable and reusable.
Compressed Air $5-$8 Great for motors.
Mild Soap/Vinegar $0 – $2 Pantry staples.
Total ~$15 Very Affordable DIY
Safety First: Before we start, remember that you are working with an electrical appliance near water sources. Always unplug the fan or turn off the circuit breaker. Wear a dust mask if you have allergies, as we will be disturbing a lot of old dust.
Preparation Steps Before Cleaning
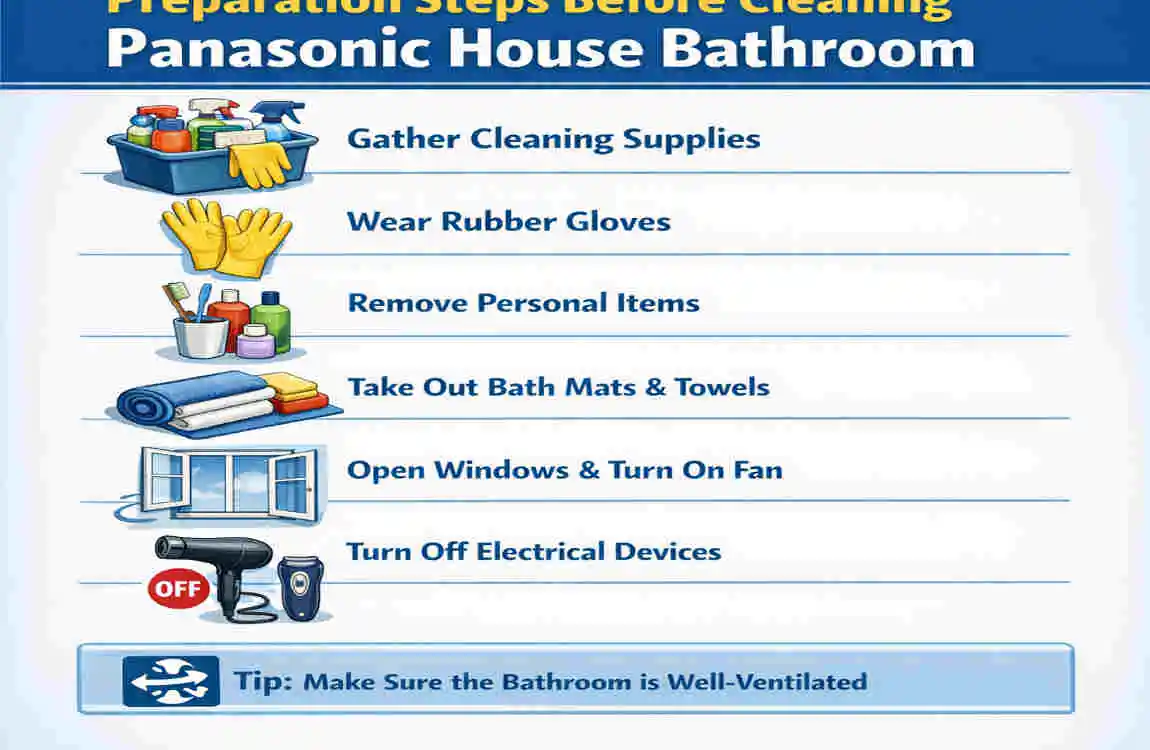
Preparation is half the battle. If you rush into this, you’ll end up with a face full of dust and a dirty bathroom floor. Let’s set the stage for a smooth cleaning session.
Kill the Power. This is non-negotiable. Go to your home’s electrical panel (breaker box). Locate the switch that controls the bathroom and flip it to “OFF.” Even though we aren’t rewiring anything, you don’t want the fan to accidentally turn on while your fingers are near the spinning blades. Pro Tip: Try flipping the bathroom wall switch to make sure the fan doesn’t turn on before you climb the ladder.
Set Up Your Workspace: Bring your ladder into the bathroom and set it up on a dry, non-slip surface. If your fan is directly over the shower or tub, place a rubber mat down first to prevent the ladder from slipping.
Protect Your Bathroom. Gravity works. Everything you clean out of that fan is going to fall. Spread a drop cloth, an old sheet, or some old newspapers over the floor, the toilet, and the vanity. This saves you from having to scrub the whole bathroom after you finish the fan.
Assess Your Fan Type: Take a quick look at your Panasonic model. Most Panasonic bathroom exhaust fans have a plastic grille that is held up by tension springs. Others might have a single screw in the center. Knowing what you are looking at helps prevent breaking things in the next step.
Step-by-Step Guide: How to Clean a Panasonic House Bathroom Fan
Now, let’s get to the fun part. We are going to break this down into manageable chunks, so you never feel overwhelmed. Follow these steps, and your fan will be running like a dream in no time.
Safely Remove the Fan Cover/Grille
This is often the trickiest part for homeowners because they fear breaking the plastic. Relax—it is designed to come off.
First, climb your ladder so you are at eye level with the fan. If your cover is held on by screws (common in older models), unscrew them and set them aside in your pocket. However, most modern Panasonic fans use tension springs.
To remove a tension spring cover, gently pull the plastic cover down a few inches. You will feel resistance—that’s the springs. Look into the gap, and you will see two metal “V” shaped wires on either side. Squeeze the two prongs of the “V” together with your fingers. This releases them from the slot in the housing.
Once the clips are free, the cover will come right off. Take this opportunity to vacuum the cover immediately. It is likely caked in grey fuzz. Vacuuming it dry is better than wetting it immediately, which turns the dust into mud. Once the loose dust is gone, you can soak the cover in a sink filled with warm soapy water while you work on the rest of the fan.
Clean the Fan Blades and Motor Housing
Now you are looking at the “guts” of the fan. You’ll probably see a motor assembly and a blower wheel (the part that spins) inside a metal box.
Vacuum First: Use the vacuum with the brush attachment to gently suck up all the loose dust bunnies hanging from the motor and from the corners of the housing. Get as much as you can while it is dry.
Wipe the Blades: This is where the magic happens. Dip your microfiber cloth into your vinegar-and-water solution (or soapy water). Wring it out until it is just damp—not dripping wet. You do not want water dripping into the motor windings.
Carefully wipe down each blade of the blower wheel. This can be tedious because the blades are curved and close together. This is where your old toothbrush comes in handy. Dip the toothbrush in the cleaning solution and gently scrub the inside curve of the blades. This removes that sticky “grease-dust” combo that hairspray and humidity create.
Panasonic Pro Tip: If your bathroom is near the kitchen, your fan may contain cooking grease. In this case, a mild degreaser or a drop of pure dish soap on the cloth works better than vinegar.
Vacuum the Exhaust Fan Interior and Duct
Once the blades are clean, look at the metal box (housing) surrounding the motor. It’s likely coated in a fine layer of dust. Use your damp cloth to wipe out the interior walls of the housing.
Next, look for the damper or the hole where the air exits the box to go outside. This is the exhaust port. Use your vacuum hose to reach as far into that duct as possible. If this duct is clogged, the fan can spin as fast as it wants, but no air will move.
Warning: Be gentle when vacuuming around the motor wires. You don’t want to disconnect anything accidentally.
Quick Clean Without Full Removal
You may be in a rush, or you may be a renter who isn’t comfortable taking things apart. Can you learn how to clean a Panasonic bathroom exhaust fan without removing it? Yes, for a maintenance clean.
If you can’t remove the cover, use a can of compressed air. Stick the red straw through the grille slots and blast the motor and blades in short bursts. This will dislodge the dust chunks. Warning: Dust will fall on you, so wear eye protection!
Once the dust is loose, hold a strong vacuum hose against the grille to suck out what you can. This isn’t as good as a deep clean, but it is better than nothing and helps maintain airflow between deep cleans.
Reassemble and Test
You are in the home stretch!
- Dry Everything: Before putting anything back, make sure the fan blades and the interior housing are completely dry. Remove your plastic cover from the sink and dry it thoroughly with a towel.
- Reattach the Cover: Squeeze the “V” springs of the cover and insert them back into their slots in the housing. Push the cover up until it snaps flush against the ceiling.
- Restore Power: Go back to your breaker box and flip the switch to “ON.”
- The Test Run: Turn on the fan. Listen. It should be significantly quieter. To test the suction, hold a single square of toilet paper up to the fan. If the fan holds the paper effortlessly against the grille, congratulations! You have successfully restored your airflow.
Troubleshooting Common Panasonic Fan Issues During Cleaning

Sometimes, cleaning reveals other problems. Or the cleaning process hit a snag. Here is a quick troubleshooting table to help you navigate common hiccups.
Issue: Potential Cause: How to Fix It
Grille won’t come off, paint seal is stuck, or springs are stuck. Run a utility knife gently around the edge if the paint is sealing it. Spray a tiny bit of WD-40 on rusted springs.
The fan is still noisy. The bearings are dry or worn out. Panasonic motors are lubricated for life, but if they screech, the motor may need to be replaced. Cleaning can’t fix bad bearings.
Fan won’t spin: capacitor issue or jammed blade. Spin the blade by hand (power off!). If it spins freely but won’t run under power, you may need a new capacitor or motor.
Mold in the duct trapped moisture. If you see black spots deep in the duct, use a long brush with a bleach/water solution to scrub it, or call a professional vent cleaner.
Rattling sound, loose screws. Tighten the mounting screws that hold the fan housing to the joists.
When to Replace: If your Panasonic fan is over 10-12 years old and cleaning doesn’t stop the noise or improve airflow, the motor may be at the end of its life. The good news is Panasonic sells replacement motors that fit into the old housing, so you don’t have to tear up your ceiling drywall!
Maintenance Tips and Prevention for Long-Term Panasonic Fan Health
You have done the hard work; now let’s make sure you don’t have to do it again anytime soon. Preventive maintenance is the secret to a long-lasting fan.
- The Monthly Swiffer: Once a month, take a long-handled duster (like a Swiffer) and run it over the fan grille. This prevents dust from building up on the intake slots and getting sucked inside.
- Run the Timer: Don’t turn the fan off the second you step out of the shower. Let it run for at least 20 minutes after you shower. This ensures all the moisture is fully evacuated from the ductwork, preventing mold from catching dust.
- Humidity Sensors: Consider upgrading your wall switch to a humidity-sensing switch. It will automatically turn the fan on when it senses moisture and turn it off when it is dry. This takes the guesswork out of ventilation.
- Combat Humidity: In humid climates, such as during the monsoon season in Lahore or summer in the southern US, running the fan periodically,, even when not showering,, can help circulate air and keep humidity down in the bathroom.
FAQs: How to Clean Panasonic House Bathroom Fan
How often should I clean my Panasonic bathroom fan? Aim for a deep clean every 6 months. However, give the cover a quick vacuum or dusting once a month to keep airflow clear.
Can I clean the fan without removing the cover? You can do a surface clean with a vacuum and compressed air, but to remove the heavy grease and dust from the blades, you really need to remove the cover. It’s worth the extra 2 minutes!
Is it safe to use water on the fan parts? You can use water on the plastic cover (grille) once it is removed from the fan. Never spray water directly into the motor or housing while it is in the ceiling. Only use a damp cloth for internal parts.
What if I break the clips while removing the cover? Don’t worry, it happens. You can buy replacement grilles or just replacement springs online for a few dollars.
My fan is still loud after cleaning. What now? If the fan is clean but still grinds or hums loudly, the motor bearings are likely shot. It is time to order a replacement motor kit from Panasonic.