
Building a kitchen counter frame involves creating a sturdy base and structure to support the countertop and provide extra storage or workspace. The process typically begins with accurately measuring your kitchen space and cutting lumber to size, followed by assembling the base, adding vertical supports, and connecting horizontal beams to form the frame. Finishing steps include sanding, painting or staining the wood, and securing the countertop material for a polished, functional home kitchen update.
Essential materials and tools needed for building a kitchen counter frame
To build a kitchen counter frame, you’ll need some essential materials. Start with sturdy plywood or MDF board for the top surface. These options provide strength and durability.
For the framework, select quality 2×4 lumber. This will give your counter stability and support weight over time. Don’t forget about screws; wood screws work best for securely fastening everything together.
Gather tools that make the process smoother. A power drill is crucial for driving in screws quickly and efficiently.
A measuring tape ensures everything fits perfectly in your space, while a level keeps your structure even. Safety gear like goggles and gloves should be on hand to protect you during construction tasks. With these supplies ready, you’re set to start building!
Step-by-step guide on building a simple kitchen counter frame
Start by measuring your home kitchen space. Knowing the dimensions is crucial for a perfect fit.
Next, gather your materials. You’ll need 2×4 lumber for the frame, wood screws, and corner brackets for added stability.
Cut the wood to size based on your measurements. Make sure you have two long pieces for the sides and shorter ones for the front and back.
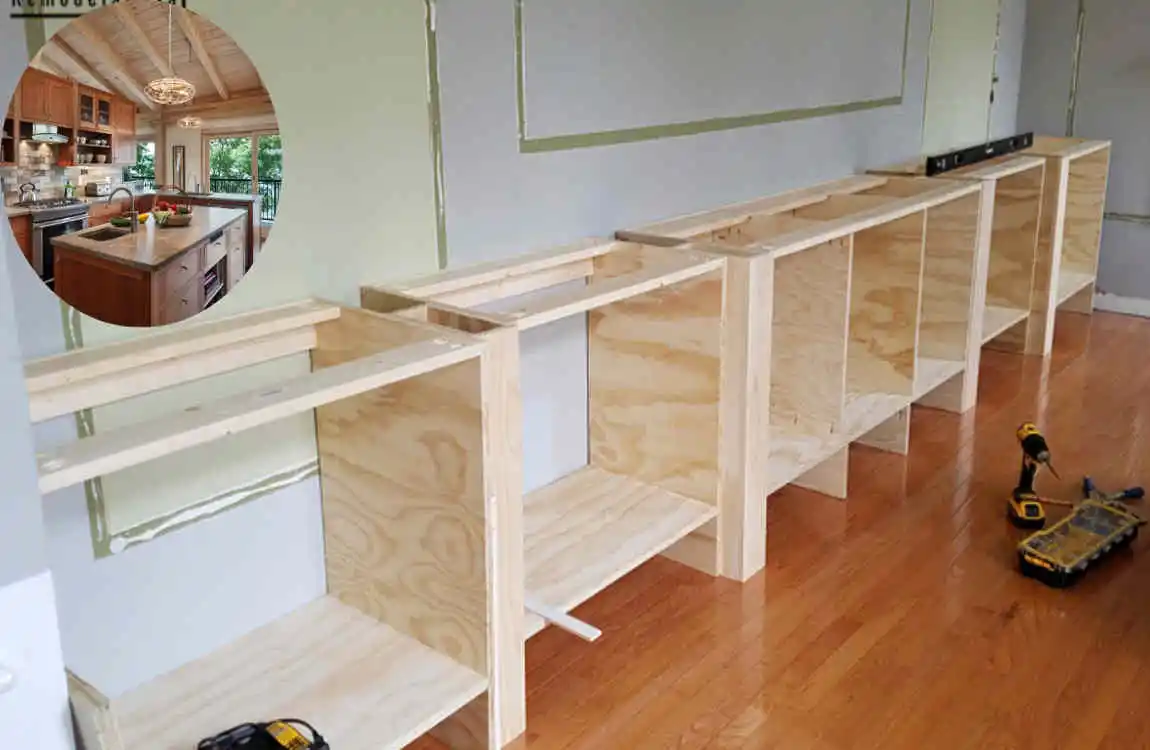
Assemble the frame on a flat surface. Lay out your pieces in a rectangular shape. Use screws to secure each joint firmly.
Add support beams if necessary, especially in larger frames. This will prevent sagging over time.
Once it’s all connected, check that everything is level using a carpenter’s level tool. Adjust as needed before securing any final screws or brackets.
Consider reinforcing corners with additional brackets to ensure longevity and sturdiness in daily use.
Tips for customizing your kitchen counter frame to fit your specific needs and space
Customizing your kitchen counter frame can elevate both functionality and aesthetics. Think about the height first. Adjust it based on who primarily uses the kitchen—taller frames work well for cooking enthusiasts, while lower ones can benefit those with accessibility needs.
Consider adding built-in storage options. Incorporating shelves or drawers into the design maximizes space and keeps essentials within reach.
Don’t forget about materials! Mixing wood with metal accents can create a modern feel, while reclaimed timber offers rustic charm. Choose finishes that complement your overall decor for a cohesive look.
Lighting is another consideration; under-cabinet lighting can enhance visibility and set a warm atmosphere.
Think about additional features like hooks for utensils or towel racks to keep everything organized without cluttering your countertops. Personal touches will make the frame uniquely yours.
You may also read (elevate your home with a kitchen makeover).
Building a kitchen counter frame: common mistakes to avoid
When constructing a kitchen counter frame, one common mistake is neglecting proper measurements. Always double-check your dimensions before cutting any materials. It only takes a few inches to make a big difference.
Another pitfall is rushing the assembly process. Take your time to ensure everything aligns correctly and fits well together. Hasty work often leads to misalignment or instability.
Using inadequate materials can compromise the strength of your frame. Invest in quality wood or metal that suits your needs and complements your kitchen design.
Don’t forget about finishing touches like sanding down rough edges or applying protective coatings. These details enhance both durability and aesthetics, giving your kitchen a professional look.
Final touches and finishing details for a polished look
Once your kitchen counter frame is built, it’s time to focus on the finishing touches. Sanding down rough edges ensures a smooth surface that feels great and looks professional.
Consider staining or painting the wood to match your kitchen’s aesthetic. A fresh coat can significantly enhance the overall appearance. Opt for water-resistant finishes if you’re concerned about spills and humidity.
Adding decorative hardware can also make a big difference. Stylish brackets or corner supports not only enhance stability but also serve as an eye-catching detail.
Don’t forget about lighting under the counter if it’s raised or has shelving beneath it. Soft illumination adds warmth and highlights your craftsmanship beautifully.
Seal all joints properly for durability. This step prevents moisture from seeping in while enhancing the longevity of your frame, ensuring it remains sturdy through years of use.
You may also read (what is a spice kitchen home guide to this unique house feature).