
House roofing nails are generally not suitable for siding installation due to key differences in design and performance. Roofing nails are shorter (typically 1¾ inches) with larger heads and smooth shanks, optimized for securing shingles flush to the roof deck. Siding nails are longer (around 2½ inches), feature ring shanks for better grip, and have smaller heads to allow material expansion without warping.
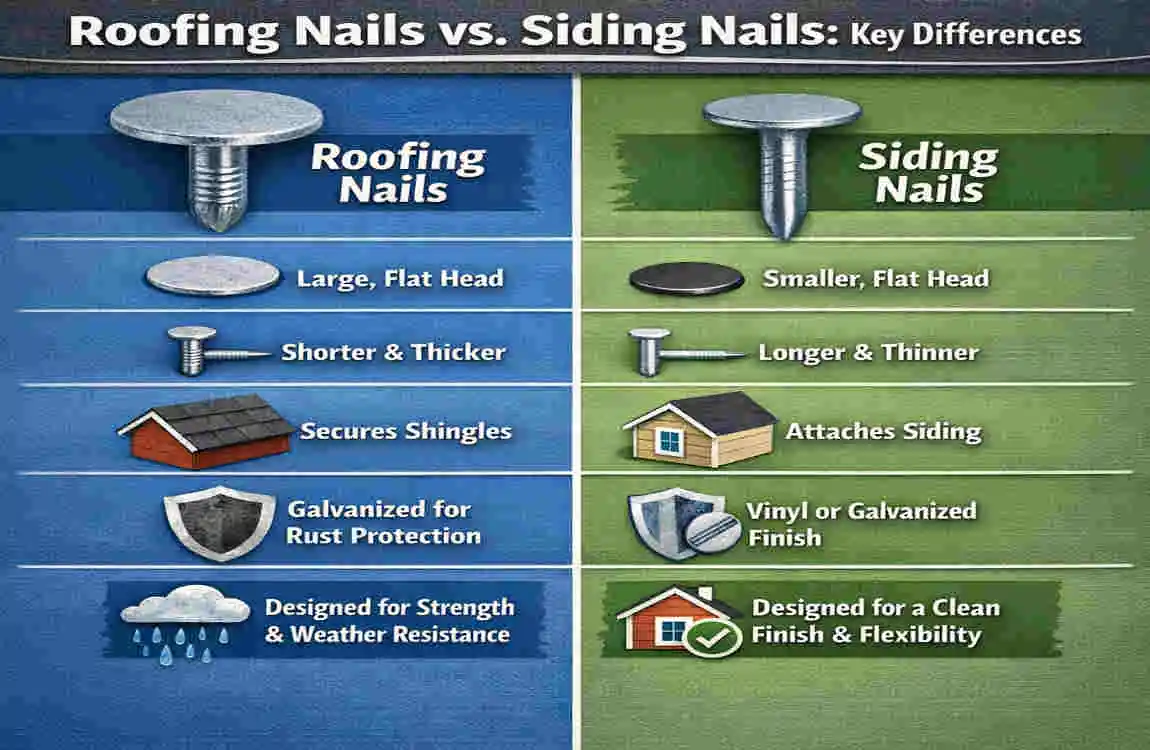
Roofing Nails vs. Siding Nails: Key Differences
To understand why you shouldn’t just grab any nail from your bucket, we first need to understand the anatomy of these fasteners. To the untrained eye, a galvanized nail looks like a galvanized nail. But in the world of construction, millimeters matter, and design is everything.
Roofing nails and siding nails are engineered for two totally different environments and stress loads. Roofing nails are designed to hold shingles flat against gravity and wind lift. Siding nails are designed to hold heavy planks vertically while allowing for the natural expansion and contraction of materials like vinyl.
Here is a breakdown of the critical differences:
Comparison: Roofing Nails vs. Siding Nails
Feature Roofing Nails Siding Nails Why It Matters for Siding
Shank Type usually Smooth or Barbed Ring (Annular) or Spiral Ring shanks grip the wood fibers tightly, preventing the siding from pulling out over time.
Head Size Large, Broad, Flat Small, Often Countersunk. Roofing heads are too big and will dimple the siding; siding heads sit flush or disappear.
Length Short (1 to 1.75 inches) Long (1.5 to 3 inches) Siding nails need to pass through the siding and sheathing to hit the studs.
Material: Galvanized Steel (11-12 gauge), Stainless/Alum (15-16 gauge). Siding is exposed to different moisture levels; specific metals prevent ugly rust streaks.
The Shank Factor
The “shank” is the long body of the nail. Roofing nails often have smooth shanks because shingles sit flat and gravity does most of the work.
Siding nails, especially those for wood or fiber-cement siding, usually feature a ring shank. These look like little ridges or rings running the length of the nail. When you drive this into wood, the wood fibers spring back into those rings, creating a locking mechanism. This is crucial for siding because the wind constantly tries to pull the panels away from the house.
The Head Size Dilemma
Roofing nails have massive heads. This is to hold down a wide area of asphalt shingles so they don’t tear in the wind.
If you try to use this on cedar clapboard or vinyl, that giant head is going to stand out like a sore thumb. Worse, if you are installing vinyl siding, you need the nail to hang loosely so the vinyl can move. The broad head of a roofing nail makes it very difficult to get this spacing right without accidentally pinning the siding too tightly against the wall.
Length and Penetration
This is where many DIYers fail. Can you use house roofing nails for siding if they are too short? Absolutely not.
Roofing nails are short because they only need to go through a thin shingle and a sheet of plywood. Siding nails must go through the siding profile (which can be thick), potentially a layer of foam insulation, the plywood sheathing, and then penetrate at least 1 inch into the solid wood stud. A 1.25-inch roofing nail won’t reach the stud. You’ll be nailing your siding to the plywood skin of your house, which offers very little structural holding power.
Can You Use House Roofing Nails for Siding? The Short Answer
We have touched on the technical specs, but let’s get straight to the point. Can you use house roofing nails for siding?
No. You really shouldn’t.
Here is the logic explained in simple terms: Design Mismatch.
Roofing nails are designed to resist pull-through. This means they stop the soft asphalt shingle from ripping over the nail head during a storm.
Siding nails are designed to resist shear and withdrawal.
- Shear: The weight of the siding is dragging the nail down.
- Withdrawal: The wind is sucking the siding away from the wall.
When you use a roofing nail on siding, you are using a tool designed for downward pressure on a vertical application. It is like using a spoon to cut a steak. You might eventually get through the meat if you press hard enough. Still, it’s going to be messy, ineffective, and ruin the dinner.
Common Myths Debunked
You might hear some “old school” advice from a neighbor or a forum post saying, “I used roofing nails on my shed, and it’s fine.” Let’s look at why this myth persists.
- “They are both galvanized, so it’s the same.”
- Reality: Galvanization only protects against rust. It does not determine holding power. A smooth shank roofing nail will slide out of a wall stud much easier than a ring-shank siding nail.
- “They are cheaper, and I have them handy.”
- Reality: This is the most dangerous myth. The cost of failure—siding buckling in the wind or falling off—will cost you hundreds or thousands of dollars in repairs. Saving $10 on nails is false economy.
- “Vinyl siding is light; it doesn’t need heavy-duty nails.”
- Reality: Vinyl is light, but it acts like a sail. When the wind blows against the side of your house, it creates a massive suction force (negative pressure). If the nails aren’t gripping the studs properly, the entire panel can unzip from the wall.
Pros of Using Roofing Nails for Siding (DIY Perspective)
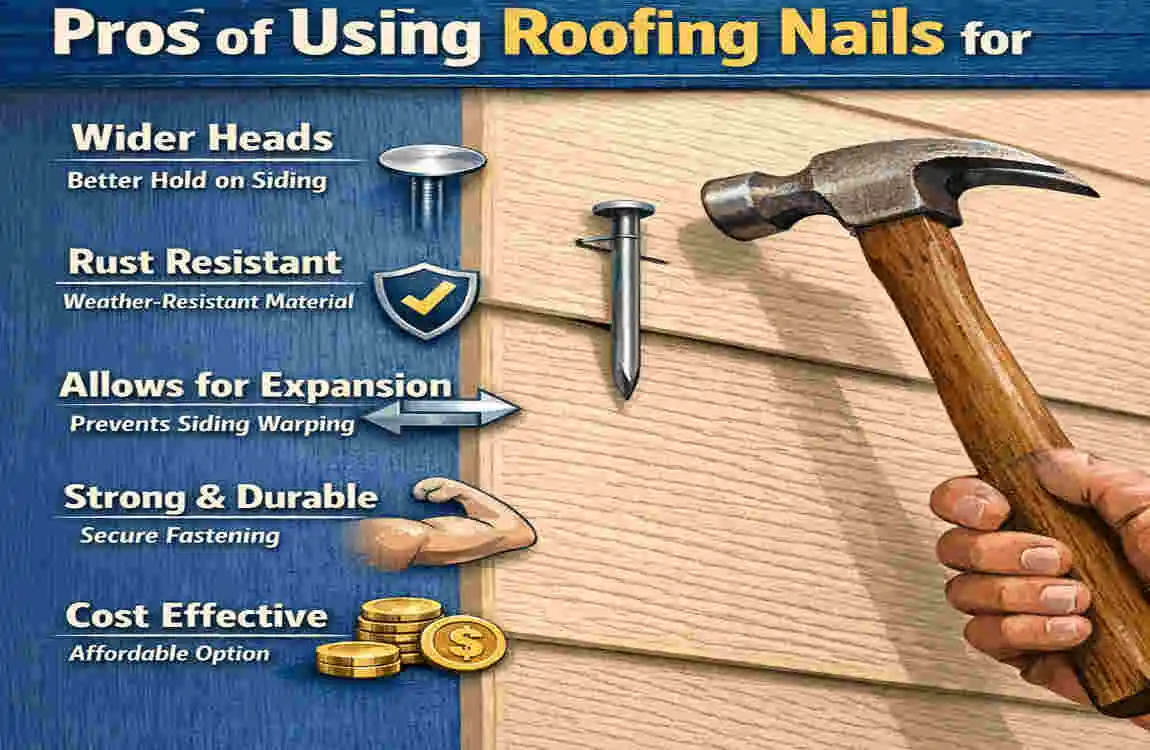
Now, to be a fair and balanced professional writer, there are some reasons why people choose to do this. I am not endorsing it, but I understand the thought process. If you are asking, ” Can you use house roofing nails for siding, you are probably looking for a reason to say “yes.”
Here are the perceived benefits from a strictly DIY, budget-conscious perspective.
Significant Cost Savings
Let’s talk money. A 5lb box of electro-galvanized roofing nails might cost you around $10 to $15. A similar box of high-quality stainless steel ring-shank siding nails can cost $35 to $50.
For a budget project, like a playhouse for the kids or a temporary repair on a woodshed, that price difference is attractive.
Extreme Availability
You can buy roofing nails anywhere. You can buy them at the big box store, the local hardware shop, and sometimes even at the grocery store or gas station if you live in a rural area.
Specialty siding nails, especially color-matched ones or stainless steel coils, often have to be ordered online or purchased at a professional lumberyard. If it’s Sunday afternoon and you want to finish the job, roofing nails are likely the only thing available.
Larger Head for Vinyl (In Theory)
Some DIYers argue that the large head of a roofing nail is actually good for vinyl siding because it creates a wider “stop” for the siding slot. In theory, this makes it harder for the siding to slip off the nail head. While this is true, the shank creates other problems. Still, the logic regarding head size has some merit in very specific, non-critical applications.
Short-Term Success
If you live in an area with no wind and a dry climate, and you are nailing into solid wood, roofing nails might hold up for a few years. I have seen sheds built with roofing nails that stood for a decade. But remember, a shed is not your primary residence, where safety and property value are paramount.
Cons and Risks of Roofing Nails on Siding
We have looked at the “why you might,” now let’s look at the “why you absolutely shouldn’t.” The risks involved when you ask, ” Can you use house roofing nails for siding are significant.
Structural Failures and “Blow-Offs.”
This is the big one. As mentioned earlier, roofing nails usually have smooth shanks. Over time, wood expands and contracts with the seasons (humidity and temperature changes). This movement naturally pushes smooth nails out of the hole—a process called “nail popping.”
On a roof, gravity fights this. On a vertical wall, gravity helps loosen the nail. Once that nail pops out a fraction of an inch, the next big wind storm will catch the siding. Because the grip is weak, the siding can be ripped right off the wall. The International Residential Code (IRC) has specific requirements for fastener withdrawal resistance that smooth roofing nails often fail to meet in siding applications.
Aesthetic Damage (The “Waffle” Look)
If you are installing cedar, fiber cement (like HardiePlank), or engineered wood, you need the nail head to sit flush with the surface so it can be painted over or hidden.
Roofing nails have large, slightly convex heads. You cannot countersink them. If you try to pound them flush, you will crush the wood fibers around the head, leaving a hammer mark or a “waffle” pattern on your siding. When the sun hits the side of your house, every single nail head will be visible as a bump or a shadow. It looks unprofessional and lowers curb appeal.
Corrosion and Rust Bleeding
Roofing nails are usually “electro-galvanized.” This is a thin zinc coating. It is fine for roofing because the shingle above them covers the nails—they aren’t exposed to direct rain.
Siding nails are exposed. Even if you paint over them, moisture gets in. That thin electro-galvanized coating will wear off quickly. Once the steel rusts, you will get ugly orange/brown streaks running down your beautiful siding. Once rust starts, it is nearly impossible to stop without replacing the nails.
Voiding Your Warranty
This is the hidden cost. Major siding manufacturers like James Hardie, LP SmartSide, and major vinyl brands have very strict installation manuals.
They almost universally specify the use of siding nails or specific screws. If you experience a product failure—say, the paint peels or the board warps—and the warranty inspector sees you used roofing nails, they will deny your claim immediately. You could be left with a $10,000 problem because you saved $20 on nails.
Case Study Example
Imagine “Steve.” Steve re-sided his house using roofing nails to save money. Two years later, a moderate tropical storm hit his area. The wind got under a loose edge of the siding. Because the smooth roofing nails didn’t have the “bite” of ring shanks, the siding didn’t just rattle—it flew off into the neighbor’s yard. Steve had to pay for new siding and labor all over again, costing him $3,000.
Best Alternatives to Roofing Nails for Siding
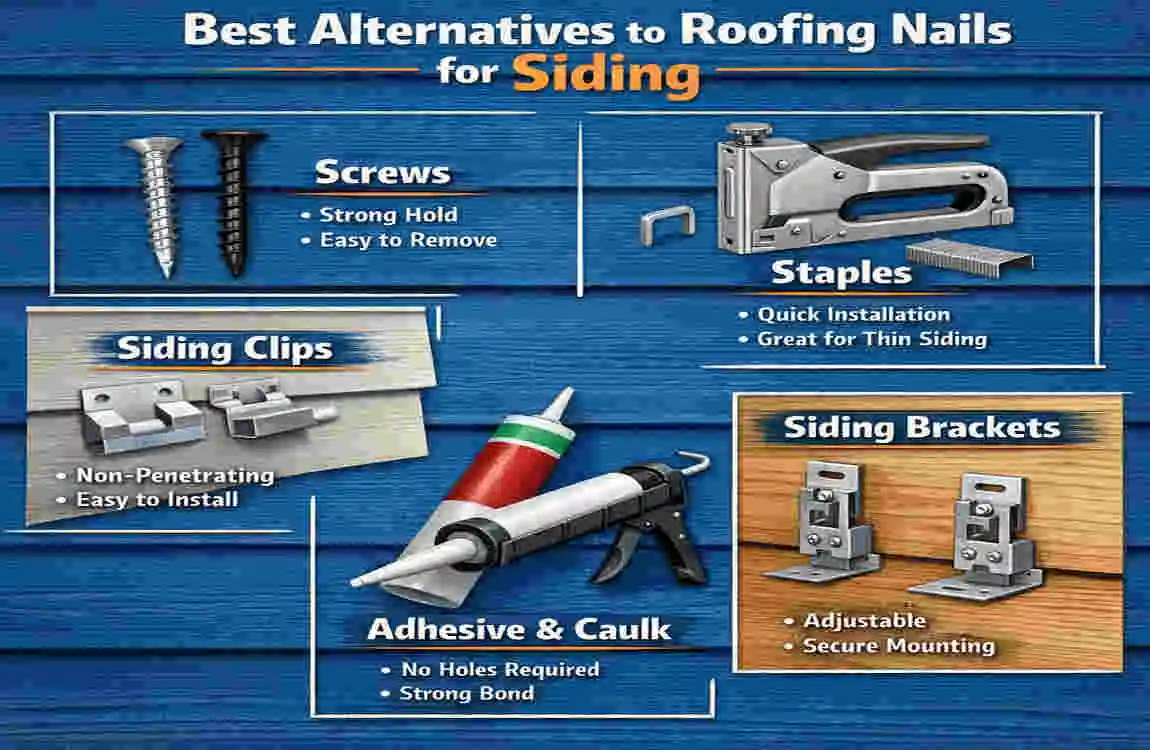
The good news is that the right nails aren’t hard to find if you know what you are looking for. Investing in the correct fasteners is the best insurance policy for your home’s exterior.
Here are the top contenders:
Ring Shank Siding Nails (The Gold Standard)
For 90% of wood and fiber cement siding jobs, this is what you want.
- Why they work: The shank has rings that lock into the wood fibers. The withdrawal strength is nearly double that of a smooth nail.
- Best for: Cedar clapboard, fiber cement, engineered wood.
- Specs: Look for stainless steel (Type 304 or 316 for coastal areas) or hot-dipped galvanized. Avoid electro-galvanized.
Stainless Steel Coil Nails
If you are using a nail gun (which makes the job 10x faster), you will likely be buying these in coils.
- Why they work: Stainless steel never rusts. Ever. If you are using cedar, you must use stainless steel nails, or the tannins in the wood will react with galvanized nails, causing black stains.
- Best for: Cedar, Redwood, and high-end installations.
Siding Screws
Modern technology has enabled the development of screws specifically designed for siding.
- Why they work: Screws hold better than any nail. Some have small heads that disappear into the siding. They are also easy to back out of if you make a mistake.
- Best for: Hardie Plank, heavy trim, and DIYers who don’t want to use a hammer or nail gun.
Vinyl Siding Nails (Aluminum or Galvanized)
Vinyl siding hangs; it isn’t nailed tight.
- Why they work: These nails have a specific head size and shank diameter that fit perfectly in the vinyl nailing slot.
- Best for: Vinyl siding only.
Alternative Fastener Comparison Chart
Alternative Best Application Price Estimate Hold Strength Rust Resistance
Ring Shank Nail Wood, Fiber Cement $15 / 1lb Excellent High (if hot-dipped)
Stainless Steel Cedar, Coastal Homes $30 / 1lb Superior Ultimate
Siding Screws Fiber Cement, Trim $25 / box Superior High
Roofing Nail DO NOT USE $8 / 1lb Poor Low
DIY Siding Installation Guide: Step-by-Step with Proper Fasteners
Now that you have bought the right nails, let’s talk about how to install them. Even the best nail will fail if installed incorrectly.
Surface Preparation
Before you nail anything, ensure your wall surface is flat. Check for rot in the sheathing. If the wood underneath is soft or rotting, no nail in the world will hold your siding up. Wrap the house in a weather-resistive barrier (house wrap) like Tyvek.
Choose Your Weapon
Select the fastener length. The general rule is that the nail must penetrate the solid wood stud (not just the plywood) by at least 1.25 inches.
- Calculation: Siding thickness (0.5″) + Sheathing (0.5″) + Penetration (1.25″) = 2.25-inch nail minimum.
Locate the Studs
Don’t guess. Use a stud finder or examine the nailing pattern of the old siding before you cover it. Mark the stud locations with a chalk line. You want to nail into the framing, not into the wall’s hollow cavity.
The Nailing Technique
- For Wood/Fiber Cement: Drive the nail flush with the siding surface. Do not overdrive it! If you countersink it too deeply, you break the surface seal, and water will get in.
- For Vinyl Siding: This is critical. Do not drive the nail too tightly. Leave about 1/16th of an inch (the thickness of a dime) between the nail head and the vinyl. Vinyl expands in the summer. If you nail it tight, it will buckle and warp when it gets hot.
Spacing
Generally, you want to place a nail every 16 inches (which typically aligns with your studs). For horizontal siding, nail roughly 1 inch down from the top edge (or follow the manufacturer’s nailing line).
Expert Tips for Siding Success & Common Mistakes to Avoid
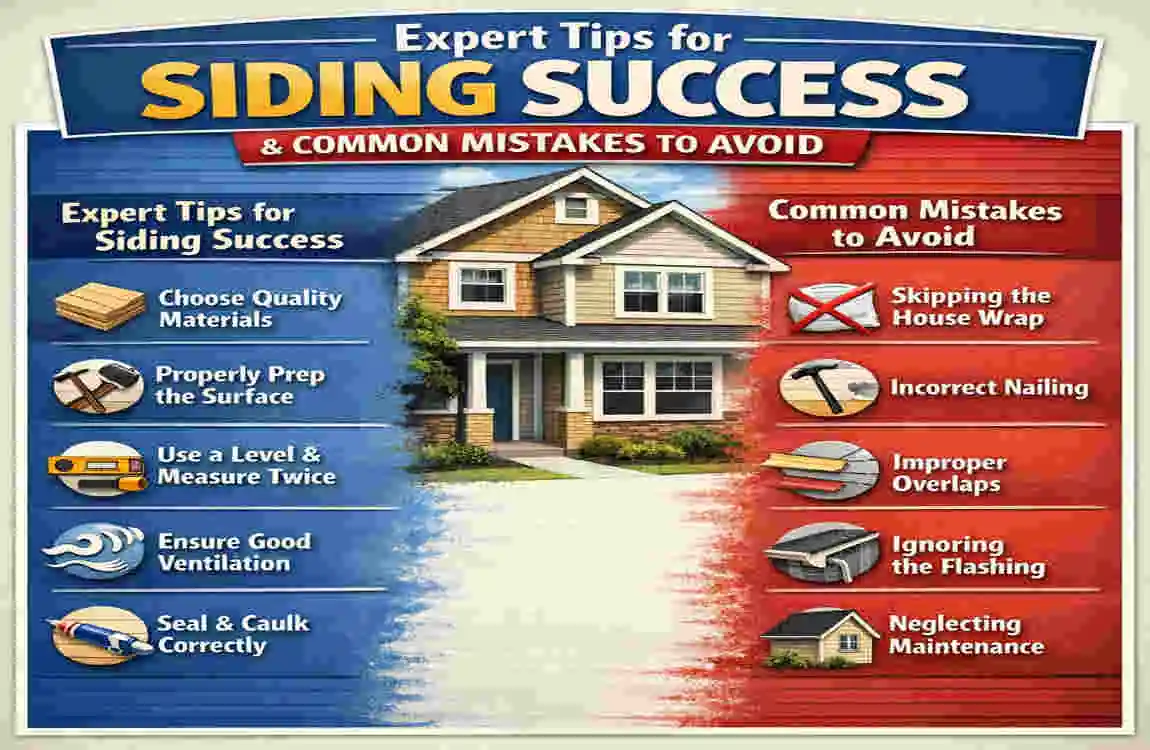
To wrap up this guide, I want to leave you with some pro-tips that I have learned from years of seeing both good and bad siding jobs.
Mind the Gap
I cannot stress this enough regarding vinyl: Vinyl moves. It can expand over an inch across a 12-foot span from winter to summer. If you use a roofing nail and hammer it flat, you have effectively pinned that siding in place. When the sun hits it, it will look like wavy bacon.
Corrosion is the Enemy
If you live near the ocean (within 5-10 miles), salt air eats galvanized steel for breakfast. You must use Grade 316 Stainless Steel nails. Yes, they cost double. But re-siding your house in 5 years costs a lot more.
Don’t Mix Metals
If you are using aluminum siding, do not use galvanized steel nails. The two different metals will react chemically (electrolysis) and cause rapid corrosion. Use aluminum nails for aluminum siding.
The “Pull Test”
Before you commit to the whole wall, drive one nail into a stud. Try to pull it out with your hammer claw. If it comes out easily with little resistance, you either missed the stud or your nails are too smooth/short. A good siding nail should fight you when you try to remove it.
FAQ
Q: Can you use house roofing nails for siding if it’s just a small repair? A: Ideally, no. Even for small repairs, mixing nail types can look bad and fail unevenly. However, for a temporary emergency fix (like a storm damaging a piece before a full repair), it will hold short-term, but replace it properly as soon as possible.
Q: What size nails should I use for vinyl siding? A: You typically need a nail that is at least 1.5 to 2 inches long to ensure it goes through the vinyl, the foam backer, the sheathing, and into the wood stud.
Q: Why are ring shank nails better than smooth nails for siding? A: Ring shank nails act like a harpoon. The wood fibers settle into the grooves of the rings, creating resistance against the wind trying to pull the siding off the house. Smooth nails rely only on friction, which weakens over time.
Q: Can I use screws instead of nails for siding? A: Yes! In fact, screws often offer superior holding power. Just make sure they are rated for exterior use (coated or stainless) and have a head size appropriate for your siding type.
Q: Will roofing nails rust on my siding? A: Most likely, yes. Roofing nails have a thinner zinc coating than siding nails because they are designed to be covered by shingles. When exposed to rain and sun on the side of a house, they tend to rust quickly.