
You have finally bought that beautiful heavy mirror you’ve been eyeing for your living room. You have the drill in hand, you’ve marked the spot, and you are ready to make a change to your space. You press the trigger, the drill bit bites into the drywall, and suddenly—ZAP! A spark flies out, the lights in the entire house go dead, and you are left standing there with a racing heart and a burnt drill bit.
It sounds like a renovation horror story, doesn’t it? Unfortunately, for many enthusiastic DIYers, this is a reality that happens all too often. One wrong drill into a hidden wire, and your weekend project sparks a disaster that goes beyond just a blown fuse. Whether you are renovating a modern apartment or fixing up an older bungalow in Lahore’s humid climate, knowing how to check for home wires in wall is the single most critical skill you can learn before you start making holes.
Hidden wires behind drywall, plaster, or concrete pose significant shock and fire risks. In countries like Pakistan, where wiring standards can vary wildly from one contractor to another, you can never assume a wall is safe. That is exactly why we created this guide.
Why Detecting Wires in Walls Matters for Renovations
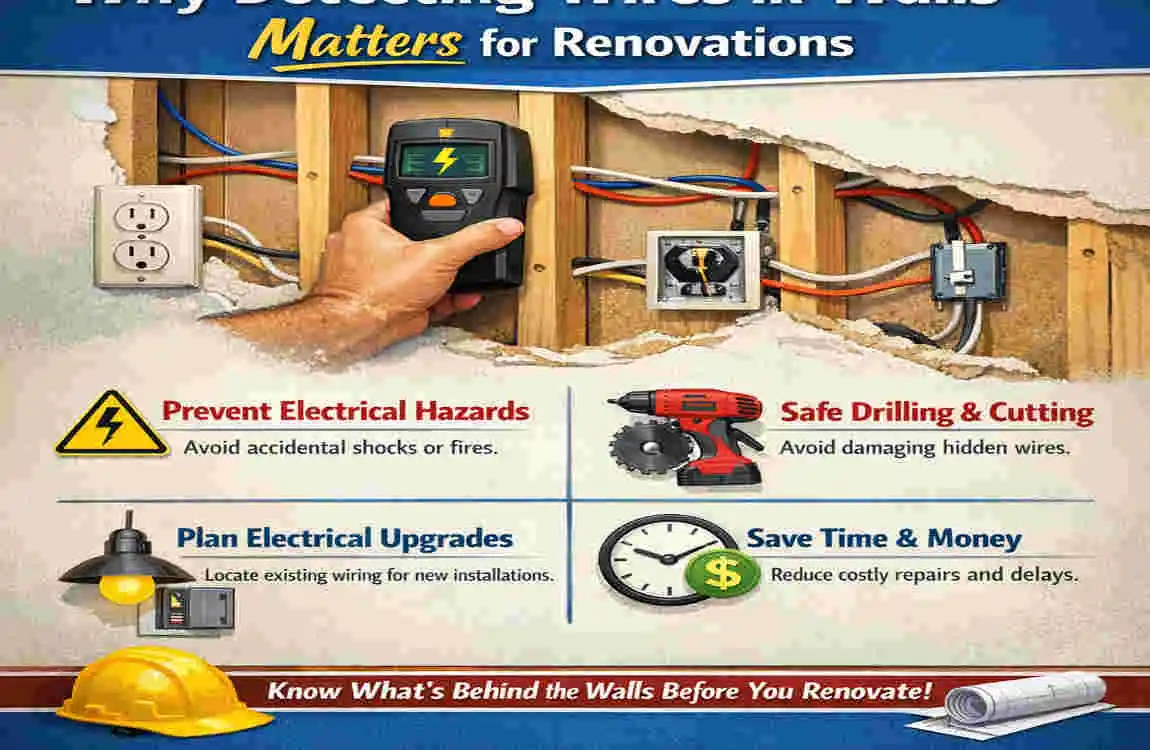
Before we jump into the “how-to,” let’s talk about the “why.” You might think, “I’ll just be careful,” or “I’m only drilling a shallow hole.” But electricity doesn’t care about your intentions. Understanding the gravity of the situation is the first step toward a safe renovation.
Risks of Ignoring Hidden Wires
Ignorance is definitely not bliss when it comes to electrical wiring. If you choose to drill or nail into a wall without checking first, you are playing Russian Roulette with your home’s infrastructure. The most immediate risk is physical injury. Striking a live wire can send 220 volts (the standard in Pakistan and many other regions) coursing through your tool and into your body.
Beyond the immediate shock hazard, there is the risk of fire. According to the NFPA, tens of thousands of home fires occur annually due to electrical issues. When you nick a wire inside a wall, you might not sever it completely. Instead, you create a “hot spot” where electricity arcs, slowly heating the surrounding insulation and drywall until it catches fire days or even weeks later.
Furthermore, there is the headache of code violations and the repairs required. Imagine installing a new split AC unit only to realize you have severed the main line to the bedroom. Now, you have to break open the wall you just painted to fix the wire. It turns a simple job into a costly, messy nightmare.
Benefits of DIY Detection
On the flip side, learning to do this yourself offers immense benefits. First and foremost is the financial saving. calling a professional electrician to scan a wall for five minutes can cost a premium. By owning a few simple tools, you keep that money in your pocket.
Secondly, it builds your confidence. When you know how to check for home wires in wall, you become more self-reliant. You won’t hesitate to hang those floating shelves or mount your TV because you will know exactly where it is safe to drill.
For those living in older homes—especially the classic structures found in places like Old Lahore or Karachi—wiring maps often don’t exist. The electrician who wired the house twenty years ago might have taken shortcuts, running wires diagonally across walls rather than in straight lines. DIY detection lets you map the quirks of your home, ensuring safety for years to come.
Essential Tools for How to Check for Home Wires in Wall
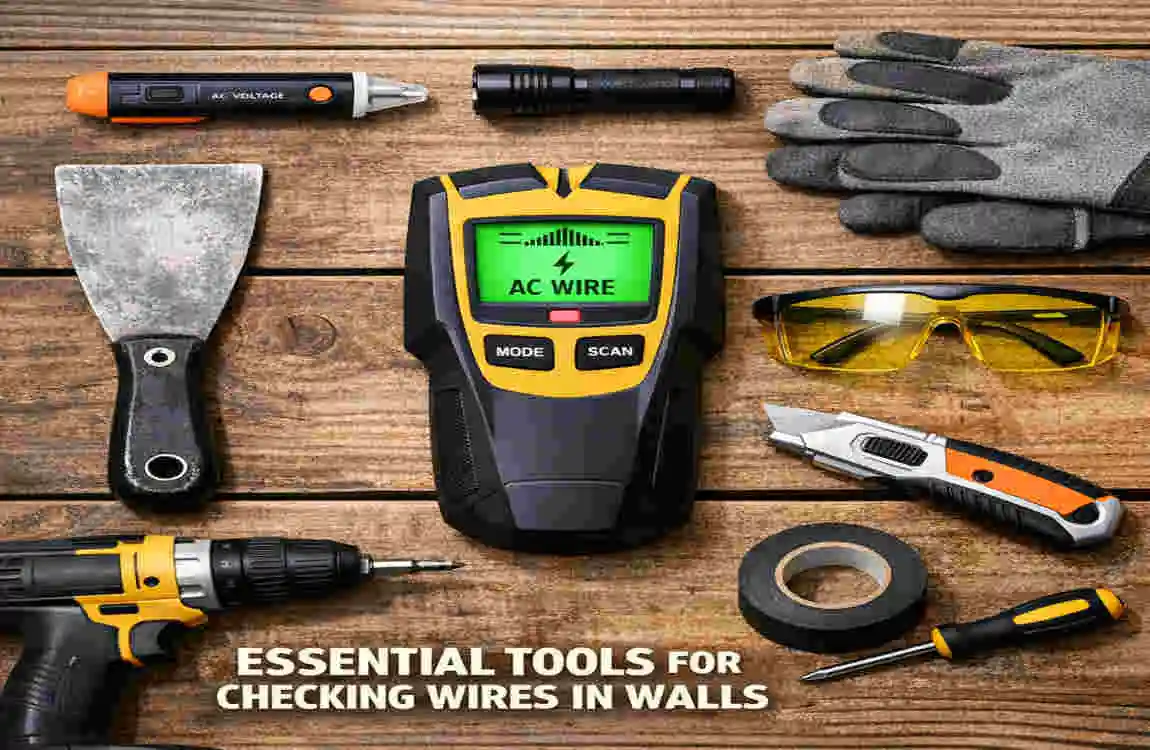
You don’t need a van full of industrial equipment to find wires. In fact, some of the best tools are handheld and surprisingly affordable. Let’s break down the essential gear you should have in your toolkit.
Must-Have Detection Tools
To make this easy, we have compared the most popular tools available. Here is a breakdown to help you decide what fits your budget and needs:
Tool Best For Price Range (PKR)Pros Cons
Stud Finder with Wire Detection Finding live/AC wires and wooden studs simultaneously. 5,000 – 10,000 Multi-function, generally accurate, durable. Requires proper calibration; can be confused by thick plaster.
Non-Contact Voltage Tester Detecting live wires quickly on the surface. 1,500 – 3,000 Instant light/beep alert, very easy to use, cheap. Cannot tell you the depth; only works on live wires.
Magnetic Wire Locator Finding metal conduits or ferrous wires. 2,000 – 4,000 : No batteries needed; very affordable. Misses non-magnetic wires; limited accuracy.
Thermal Imaging Camera Visualizing heat generated by live wires. 10,000+ Provides a visual heat map; looks cool. Expensive for beginners; requires a learning curve.
Wire Tracer Kit Tracing specific circuits from outlet to breaker. 4,000 – 8,000 precise tracing of paths. Requires access to an outlet; more technical setup.
Stud Finder with Wire Detection: Your best friend. A good-quality stud finder (like the Bosch GMS120 or similar generic brands) doesn’t just find wooden or metal support beams; it also has a specific sensor for AC voltage. When you pass it over a live wire, it screams at you (usually with a red light and a beep). It is the most versatile tool for the job.
Non-Contact Voltage Tester: Often shaped like a thick pen, this tool is great for a quick check. You hold the tip near the wall. If it detects an electromagnetic field from a live wire, it lights up. It is less precise than a stud finder in terms of location, but it is excellent for double-checking an area.
Thermal Imaging: While this sounds like sci-fi tech, you can buy smartphone attachments (like the FLIR One). Live wires generate a tiny amount of heat. A thermal camera sees this heat difference through the drywall. It is incredibly effective but acts as a pricier investment.
Affordable Alternatives and Where to Buy in Pakistan
If you are working on a strict budget, don’t worry. You can still be safe. You can find many of these tools on Daraz.pk or at local electronics markets.
In Lahore, for example, a trip to Hall Road is a rite of passage for DIYers. You can find non-branded voltage detectors there for as low as PKR 1,000. While they might not last a lifetime, they will do the job for a single renovation project.
Pro Tip: If you can only buy one tool, start with a mid-range combo stud finder (around PKR 2,000-3,000). It gives you the best balance of stud detection and wire warning.
Step-by-Step Guide: How to Check for Home Wires in Wall Safely
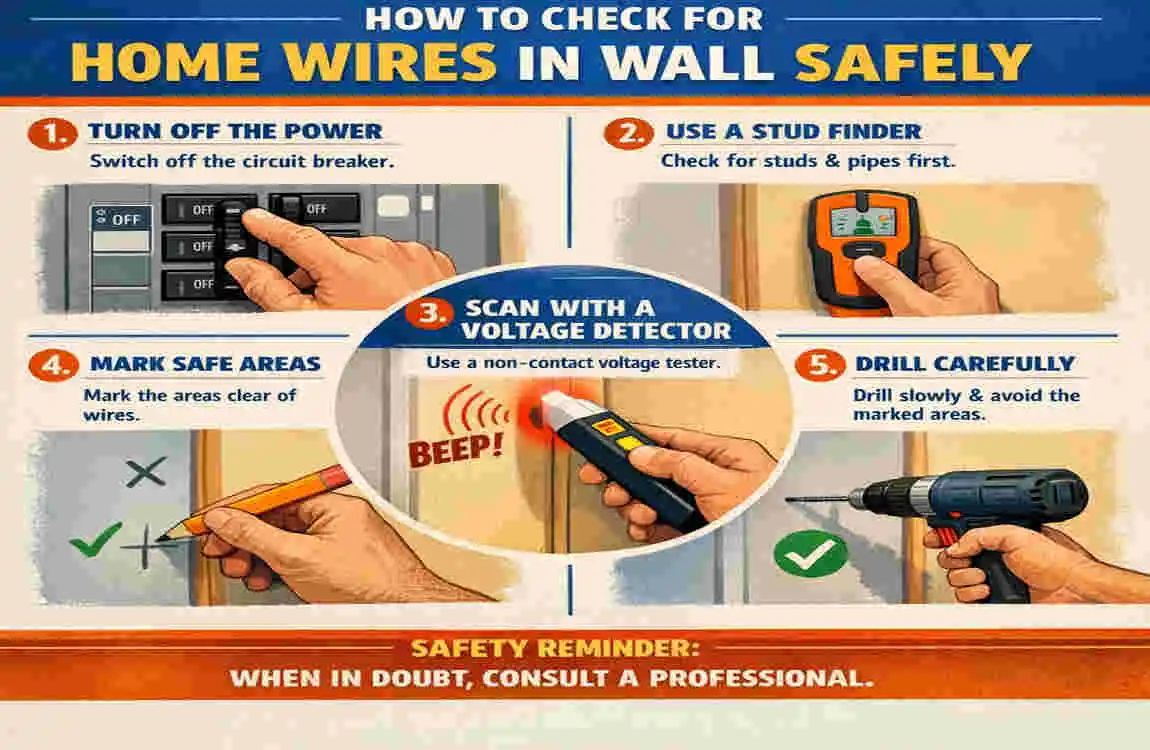
Now that you are equipped, let’s get to work. Follow this process slowly. Do not rush. Safety is about precision, not speed.
Preparation Steps
Before you even touch a tool to the wall, you need to prep the area.
- Analyze the Room: Look at where your outlets and switches are. In modern construction, wires usually run vertically (up and down) or horizontally from these points. Visualize a grid connecting them.
- Clear the Surface: Remove artwork, furniture, or anything obstructing the wall. You need smooth contact for your tools.
- Safety Gear: Put on rubber-soled shoes and dry gloves. It might seem like overkill, but insulation is your last line of defense.
- Power Check: Ideally, you want the power ON initially to detect the current, but you must be ready to turn it OFF immediately before drilling.
Using a Stud Finder with Wire Detection
This is the standard method for a reason—it works well for most drywall and plaster walls.
- Calibrate the Tool: This is where most people mess up. Place the stud finder flat against the wall in an area where you know there are no wires (tapping the wall to find a hollow sound helps). Press and hold the calibration button until it beeps. Now the tool knows the baseline density of your wall.
- Select the Mode: Switch the device to “AC Scan” or “Voltage” mode.
- The Slow Scan: Place the device flat against the wall. Move it slowly horizontally. Do not lift it off the wall.
- Mark the Spot: When the tool beeps or flashes red, stop. Mark that spot with a pencil. Continue moving past it until the beeping stops, and mark that spot too. The wire is likely right in the middle of those two marks.
- Vertical Check: Repeat the process vertically to determine the direction the wire is running.
Non-Contact Voltage Tester for Live Wires
If you suspect a wire is near the surface, or you want to trace a line from a switch, use the voltage pen.
- Verify Function: Test the pen on a known lamp cord or outlet first to make sure the batteries are working. It should chirp or light up.
- Trace the Path: Start at an outlet. Hold the tester tip against the wall. Slowly move it upwards.
- Listen closely: As you move away from the outlet, the beeping might stop if the wire goes deep. If the wire stays close to the drywall, the pen will keep beeping. This helps you visualize the “highway” the electricity is traveling on.
- Safety Note: This tool only detects live wires. If a switch is off, the wire leading to the light fixture might not trigger the sensor. Always turn switches on (carefully) when testing, then shut the main breaker off before working.
Advanced Techniques with Tracers or Thermal Cameras
For the tech-savvy renovator, or if you are dealing with confusing readings, step up your game.
- Wire Tracers: These come with two parts—a transmitter and a receiver. Plug the transmitter into the outlet. It sends a specific radio signal down the wire. Now, take the receiver and wave it over the wall. It will pick up that specific signal, allowing you to trace the wire’s path with pinpoint accuracy, even if it zig-zags.
- Thermal Imaging: Attach the camera to your phone. Scan the wall. You are looking for a straight line of heat that is slightly warmer than the surrounding wall. This is excellent for spotting wires under heavy load (like a line running to a heater or AC).
Low-Tech Visual and Knock Tests
Sometimes, you don’t have batteries. You can use your eyes and ears, though this is risky and should be a last resort.
- The Logic Test: Wires rarely run diagonally (unless the house was built unprofessionally). If you are drilling directly above an outlet or directly horizontally from a switch, stop. Assume there is a wire there.
- The Ghost Outlet: Look on the other side of the wall. Is there an outlet in the next room? Wires are often shared between walls.
- The Knock: Tap the wall. A stud sounds solid (thud). A hollow space sounds like a drum. Wires usually run through the hollow spaces or are stapled to the side of the studs. If you hear a solid thud, it might be a stud, but it could also be a protective metal plate covering a wire.
Common Mistakes and Troubleshooting When Detecting Wires
Even with the best tools, things can go wrong. Here are the pitfalls to avoid so you don’t get a nasty surprise.
Top Errors to Avoid
Forgetting the “Ghost” Wire: Many people check for wires connected to the outlet in the room they are in, but they forget about wires passing through the room to get somewhere else. Just because there is no outlet on your wall doesn’t mean a main line isn’t running behind it to the floor above. Always scan everything.
Skipping Calibration: We mentioned this before, but it bears repeating. If you don’t calibrate your stud finder, it might scream at everything or nothing at all. Calibrate every time you lift the tool off the wall.
Ignoring Weak Signals: If your tool gives a faint beep, don’t ignore it. It may mean the wire is deeper than usual, or shielded by a metal pipe. Treat every signal as a live wire until proven otherwise.
What If Detection Fails?
Sometimes, the wall is just too thick. In older homes in Pakistan, walls are often made of solid brick and thick plaster, not hollow drywall. Electronic stud finders struggle here.
The Solution: If you have solid brick walls, wires are usually buried in shallow channels and plastered over. You can sometimes see a faint “hump” or hairline cracks in the plaster where the wire runs. If you are unsure, gently chip away a small test area of the plaster with a manual chisel (insulated handle!) rather than powering through with a drill.
Also, beware of Knob and Tube wiring. This is very old technology found in pre-1980s homes. The wires are separated and might not produce a strong enough electromagnetic field for cheap testers to detect. If your home is ancient, proceed with extreme caution.
If you are getting inconsistent readings—beeps everywhere, or random signals—it is time to stop. This is the warning sign to call a professional. Don’t let pride cost you your safety.
Safety Tips and Best Practices for DIY Wire Detection
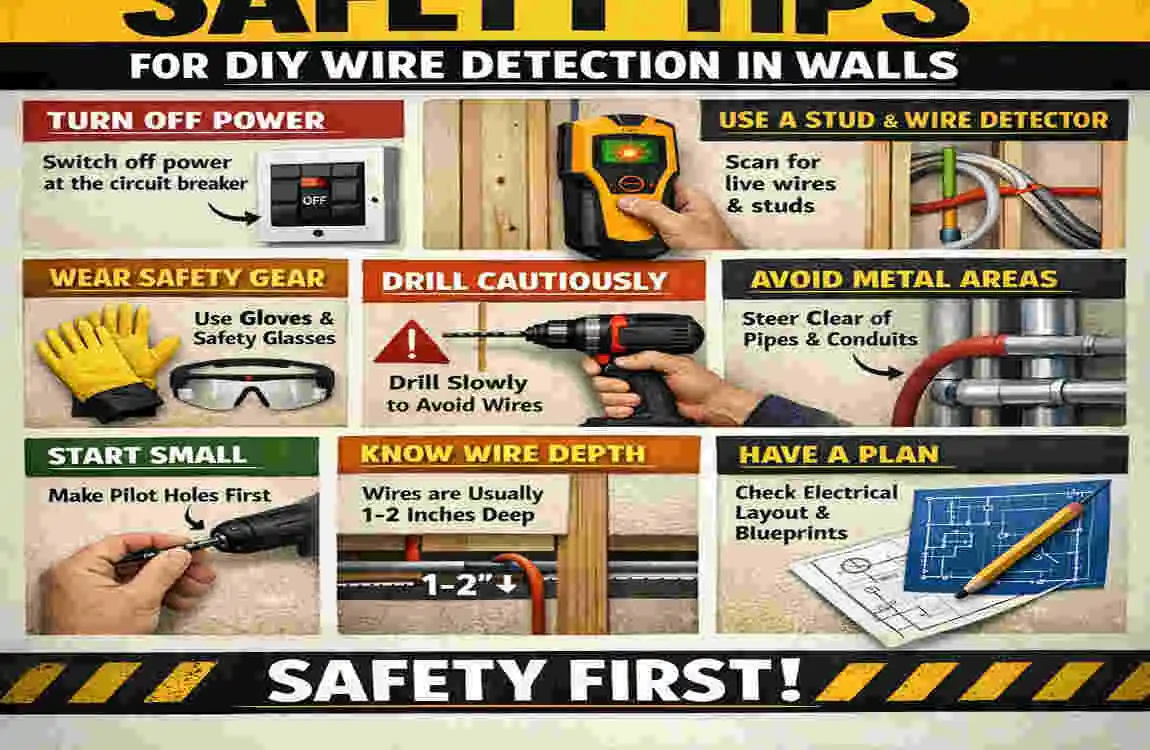
You are almost ready to start, but let’s lock in some safety rules. These are the “Golden Rules” of DIY electrical safety.
- PPE is Key: Always wear rubber-soled shoes. If you do hit a wire, you want to isolate yourself from the ground to prevent the current from traveling through you. Safety glasses are also a must—sparks and debris can blind you in an instant.
- The Buddy System: Never do electrical work or high-risk drilling alone. If you get shocked and cannot let go (a phenomenon called muscular tetanus), you need someone there to kick the ladder out or shut off the main breaker.
- Manage Humidity: In humid regions like Punjab during the monsoon, walls can hold moisture. Moisture conducts electricity and can confuse your sensors, making the whole wall look “live.” If the walls feel damp, dry the room with a fan or dehumidifier before testing.
- Know the Codes: Familiarize yourself with basic guidelines from the Pakistan Engineering Council (PEC) or your local authority. They often dictate how deep wires should be and what zones are safe.
- Trust, But Verify: Even if the tool says it’s clear, start your hole slowly. Don’t push hard. If you feel sudden resistance that feels “spongy” or “metallic” (different from brick or wood), stop immediately.
FAQs
H2: Frequently Asked Questions
How accurate are stud finders for wires? Most modern stud finders are about 80-95% accurate for standard drywall. However, factors like thick plaster, metallic wallpaper, or deep wires can reduce accuracy. Always use them in combination with a voltage tester for the best results.
Can I check for wires without tools? It is very difficult and risky. You can look for visual clues, such as the location of outlets and switches, but you cannot “see” inside the wall. We highly recommend investing in at least a basic voltage tester for under PKR 2,000.
How deep do wires run in walls? Standard regulations usually require wires to be about 1 to 2 inches deep in the wall, often running through the center of studs. However, in masonry walls (brick/concrete), they might be shallower, just under the plaster layer.
Is it safe for renters in Lahore to do this? Yes, using detection tools is completely non-invasive. You aren’t damaging the wall by scanning it. It is actually a great way for renters to ensure they don’t lose their security deposit by accidentally drilling into a line!
What is the best tool under PKR 5,000? For that budget, I recommend buying a combo: a decent magnetic stud finder (around PKR 2,000) and a high-quality non-contact voltage tester (around PKR 2,500). Together, they give you a very reliable safety net.