
Greasy fingerprints near the light switches? Mysterious scuffs in the hallway? Or are you dealing with that dreaded monsoon mold creeping up the corners? We have all been there. You scrub the floors, dust the shelves, and vacuum the rugs, but somehow the room still feels a bit… dingy.
The culprit is often right in front of your face: your walls.
Cleaning your walls is the most overlooked chore in housekeeping, yet it makes the biggest impact. Fresh, clean walls instantly brighten a room, making the space feel larger and more inviting. Conversely, ignored walls collect dust, absorb odors, and harbor allergens that can affect your family’s health.
Why and When to Clean House Walls
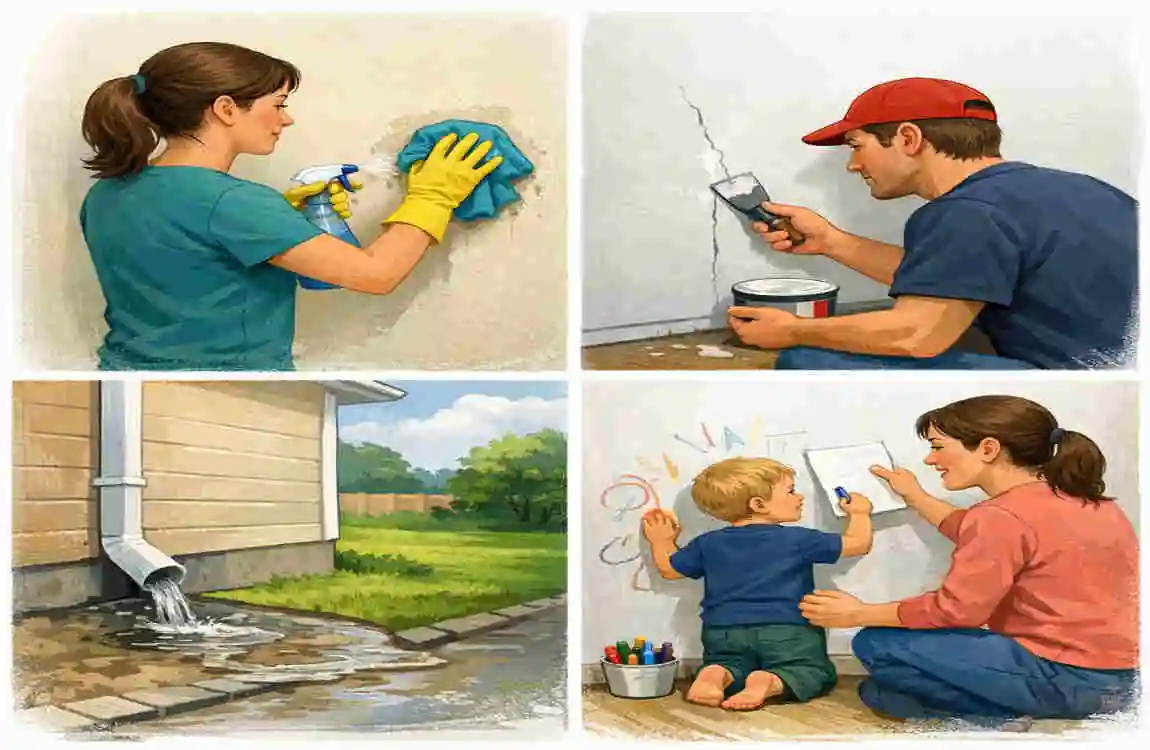
You might be thinking, “Do I really need to wash my walls? They look fine.” But take a closer look. Over time, vertical surfaces collect a surprising amount of dust, cobwebs, and microscopic grease particles from cooking. This buildup creates a thin film that dulls your paint color and traps stale odors.
The Hidden Health Benefits
Cleaning your walls isn’t just about aesthetics; it is about health.
- Allergen Reduction: Dust mites love the texture of drywall. Removing this dust can significantly improve indoor air quality.
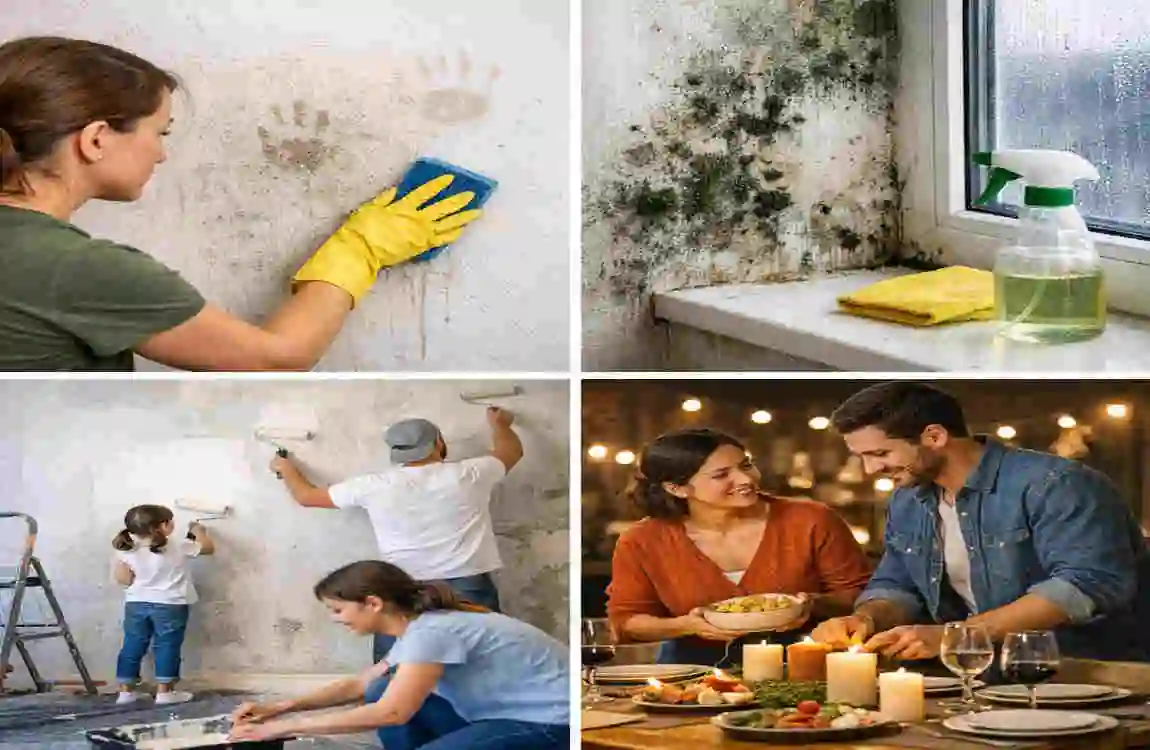
- Mold Prevention: In humid climates, like during the Punjab monsoon season, moisture settles on walls. Regular cleaning kills mold spores before they bloom into black spots.
- Chemical Reduction: By washing away built-up pollutants, you reduce the Volatile Organic Compounds (VOCs) in your home by up to 30%.
Protecting Your Investment
Paint is expensive. A professional repainting job for a standard living room can cost thousands. By learning how to clean house walls properly, you extend the life of your current paint job. You can often delay repainting by 2 to 3 years just by keeping the surface clean. A well-maintained home also holds its value better; spotless walls can boost perceived resale value by 2-5%.
When is the Right Time?
- Spot Cleaning: Do this monthly. Target high-traffic areas like light switches, doorframes, and the hallway “landing strip” where everyone drops their bags.
- Deep Cleaning: Aim for a full wall wash once a year, or ideally, seasonally. Spring cleaning is great, but a post-summer clean is essential in humid areas to remove any lingering dampness or mold spores.
Types of House Walls and Cleaning Challenges
Before you grab a sponge, you need to know what you are touching. Not all walls are created equal. Using the wrong method on the wrong surface is the fastest way to ruin a paint job. The technique for cleaning house walls varies depending on the finish.
Knowing Your Paint Finish
The shinier the paint, the tougher it is. The flatter the paint, the more delicate it is.
- Flat/Matte Paint: This has no shine. It hides imperfections in the drywall but holds onto dirt. Warning: If you scrub too hard, you will “burnish” the paint, leaving a shiny spot that looks worse than the stain.
- Eggshell/Satin: This has a soft glow. It is easier to clean than matte but still requires a gentle touch.
- Semi-Gloss/Gloss: Usually found in kitchens and bathrooms. These are durable and can handle a bit more scrubbing and moisture.
Here is a quick reference guide to help you identify your cleaning strategy:
Wall Type, Major Challenges, Best Cleaning Approach
Painted (Matte) Water streaks, burnishing, Damp cloth only, very mild soap.
Painted (Gloss) Grease buildup, dullness. Degreaser or vinegar solution.
Textured/Popcorn Traps dust like a magnet. Vacuum with a brush attachment first.
Wallpaper (Vinyl) Peeling edges. Wipe gently, do not soak.
Wallpaper (Paper) Water damage Dry sponge or “dough” cleaner only.
Wood Paneling: Drying out, oil buildup,—Murphy’s Oil Soap, or tea brew.
Tile/Plaster: Grout mold. Vinegar and baking soda paste.
Essential Tools and Eco-Friendly Supplies for Wall Cleaning
You do not need to buy expensive “wall erasers” or harsh chemical sprays. The best tools for cleaning house walls are likely already in your pantry or garage. Going eco-friendly is safer for your kids and pets and much cheaper.
The Tool Kit
Here is a breakdown of what you need. If you are in Pakistan, we have estimated the costs in PKR to show you how affordable this is.
CategoryEco-Friendly PicksEstimated Cost (PKR)
Basics Microfiber cloths (white), Soft sponges (non-abrasive) 200 – 500
Application 2 Buckets (one wash, one rinse), Spray bottle 300 – 600
Reach Step ladder, Flat mop with extendable handle 1,000 – 1,500
Prep Old bedsheets (drop cloths), Painter’s tape 300
Safety Rubber gloves, Dust mask (for mold) 500
Homemade Cleaning Recipes
Why buy when you can brew? These natural solutions cut through grime without stripping paint.
The All-Purpose Wall Wash
- Ingredients: 1 gallon of warm water + 1/4 cup of white vinegar.
- Why it works: Vinegar is a mild acid that cuts through dust and grease but is gentle enough for most paints. The smell vanishes as soon as it dries.
The Heavy-Duty Degreaser (Kitchens)
- Ingredients: 1/2 cup baking soda, 1 gallon of warm water, and 1 teaspoon of dish soap.
- Why it works: Baking soda provides a very mild abrasive action to lift sticky oil, while the soap breaks the surface tension of the grease.
The Mold Buster (Bathrooms/Humid Rooms)
- Ingredients: Hydrogen peroxide (3%) in a spray bottle. Do not dilute.
- Why it works: It kills mold spores on contact and bleaches the dark stain without the harsh fumes of chlorine bleach.
Preparation: How to Prep Walls Before Cleaning
You wouldn’t wash your car while it is covered in mud, right? The same logic applies here. If you skip preparation, you will smear wet dust around, creating muddy streaks that are impossible to remove.
Clear the Zone. Move furniture away from the walls. You need about 3 feet of working space. If a piece is too heavy to move, cover it with a plastic sheet or an old bedsheet.
Protect the floors from water drips. It is gravity. Lay down towels or drop cloths along the baseboards to catch drips. This protects your carpet or hardwood floors from water damage.
Tape the trim. If you are worried about dripping onto your wooden baseboards or electrical outlets, put a strip of Painter’s tape over them. This is a pro move that saves cleanup time later.
The Dry Dust (Crucial!) This is the most important step in learning how to clean house walls. You must remove loose dust before adding water.
- Use a vacuum cleaner with a soft brush attachment.
- Start at the ceiling and work your way down.
- Don’t forget the cobwebs in the corners and the dust on the door frames.
- Alternative: If you don’t have a vacuum, tack a clean, dry microfiber cloth to a broom and sweep the walls gently.
Ventilate. Open the windows and turn on the fans. In humid climates like Lahore, walls take longer to dry. Good airflow prevents new mold from forming while you clean.
Step-by-Step Guide: How to Clean House Walls Like a Pro
Now that your walls are dusted and your buckets are ready, let’s get to the actual cleaning. Follow this workflow for streak-free results.
Dust and Dry Clean Recap
We mentioned this in prep, but ensure you have been thorough. If you have “popcorn” ceilings or heavily textured walls, use a static duster. It grabs dust from the crevices better than a vacuum. Look for “soot tags” (those black dusty webs) near air vents and gently lift them off—do not rub them, or they will smear.
Tackle Stains and Spots
Before doing the full wash, treat the “problem areas.”
- Fingerprints and Smudges: Put a tiny dab of dish soap on a damp sponge. Gently rub the mark in a circular motion. Rinse immediately.
- Crayon and Pencil: This is a classic parent struggle. Make a paste of baking soda and water. Rub it gently over the crayon mark. The baking soda acts as an eraser.
- Scuffs: A clean tennis ball works wonders on scuff marks! Rub the ball against the scuff, and the friction from the rubber lifts it right off.
Stain Removal Cheat Sheet:
Stain TypeEco-SolutionDwell Time (Wait time)
Grease/Oil Vinegar & Water spray 5 minutes
Mold/Mildew Hydrogen Peroxide 10 minutes
Ink/Marker Rubbing Alcohol (Isopropanol) Spot test immediately
Coffee/Tea Lemon Juice (mild bleach effect) 2-3 minutes
The Full Wall Wash
This is the main event. Fill one bucket with your cleaning solution (vinegar/water or soap/water) and the second bucket with plain, clean water for rinsing.
- Dip and Wring: Dip your microfiber cloth or sponge into the cleaning solution. Wring it out until it is barely damp. Never soak the wall. Water is the enemy of drywall.
- The “Bottom-Up” Technique: This sounds counterintuitive, but professional cleaners wash walls from the bottom up. Why? If you start at the top, dirty water drips onto the dry, dirty wall below, creating “rivulets” or streaks that are very hard to clean. If the bottom is already wet and clean, the drips wipe right off.
- Work in Sections: Visualize a 3-foot by 3-foot square. Wash that section with circular motions.
- The Rinse: Immediately take a fresh cloth from the “clean water” bucket. Wring it out and wipe the same section to remove any soap residue.
- Move Up: Move to the next 3×3 section above the one you just finished. Overlap the edges slightly to prevent lines.
Cleaning Special Surfaces
- Textured Walls: Use a soft-bristled scrub brush or a thick sock instead of a sponge. The sock fibers can get into the nooks and crannies without shredding like a sponge would on rough plaster.
- Wallpaper: Be incredibly careful. Water can dissolve the adhesive on the back of the paper. Use a “dough cleaner” (available at hardware stores), which picks up dirt without water. If you must wipe it, use a damp cloth with almost no moisture.
- Wood Paneling: Wood loves oil. Mix 1/4 cup olive oil with 1/4 cup vinegar and 2 cups warm water. Wipe onto the wood to clean and nourish it simultaneously.
Dry, Inspect, and Protect
Once the wall is finished, use a clean, dry towel to pat it to absorb excess moisture gently.
- Inspect: Turn on a bright light or open the curtains. Look for any streaks. If you see them, buff them out gently with a dry microfiber cloth.
- Touch Up: Now is the perfect time to fix tiny chips. Keep a small jar of touch-up paint handy. Use a Q-tip to dab paint onto small scratches.
- Protect: For glossy surfaces (like tile or wainscoting), you can apply a very thin layer of car wax to make it easier to wipe down in the future.
Eco-Friendly Hacks and Natural Alternatives
We promised an eco-friendly guide, and we are delivering. Commercial wall cleaners are often loaded with ammonia and synthetic fragrances that can trigger asthma. Here is how to keep it green.
- Tea for Tannins: Did you know black tea is great for cleaning wood walls? Brew two bags of black tea in a quart of water. Let it cool. The tannins in the tea help clean and shine wood finishes without damaging the grain.
- Lemon for Grease: In the kitchen, cut a lemon in half and dip the cut side in salt. Scrub this gently on tile backsplashes to cut through heavy curry grease or oil splatters. It smells amazing and works better than bleach.
- The Zero-Waste Cloth: Stop using paper towels. They tear on textured walls and leave lint behind. Cut up old cotton t-shirts or buy a pack of high-quality microfiber cloths. They can be washed 500 times.
- Cost Savings: By skipping the “Magic Erasers” and chemical sprays, you can save roughly PKR 2,000 to 3,000 per year on cleaning supplies. Plus, you are keeping plastic bottles out of the landfill.
Common Mistakes When Cleaning House Walls
Even with the best intentions, things can go wrong. Here are the pitfalls to avoid when learning how to clean house walls.
- Using Too Much Water: We cannot stress this enough. Drywall is basically paper and gypsum dust. If it gets soaked, it bubbles and warps. Your sponge should be damp, not dripping.
- Scrubbing Too Hard: If a stain isn’t coming off, don’t muscle it. You will rub the paint right off the wall. Apply your cleaner, let it sit for 5 minutes, and try again gently.
- Using Dirty Water: If your wash bucket water turns gray/brown, dump it out! Washing a wall with dirty water leaves a thin layer of mud on the surface. Change your water frequently.
- Using Alcohol on Latex Paint: Rubbing alcohol is great for ink, but it can liquefy some latex paints. Always test it in a hidden spot first.
- Ignoring the Finish: Using a harsh scrubber on matte paint will leave a shiny “bald spot” that you cannot fix without repainting the whole wall.
Maintenance Tips for Long-Lasting Clean Walls
You have done the hard work; now let’s keep it that way.
- The Weekly Wipe: Add “spot cleaning” to your weekly chore list. It takes 5 minutes to wipe the light switches and door jambs. This prevents oils from building up and hardening.
- Manage Humidity: In areas like Punjab, humidity is the enemy. Use a dehumidifier during the rainy season. Keep air circulating. Mold cannot grow on dry walls.
- Move Furniture: Keep sofas and chairs pulled 2 inches away from the wall. This prevents scuff marks and allows air to flow behind furniture, preventing mold growth.
- The Annual Checklist: Mark your calendar. Pick a weekend in the spring or fall for your deep clean. Doing it regularly prevents the dust from bonding to the paint, making the job easier every year.
FAQs: How to Clean House Walls
How to clean house walls without removing paint? The secret is to use a mild cleaner (like water and dish soap) and a soft material (microfiber or soft sponge). Avoid abrasive scrubbers, such as steel wool or the green side of a kitchen sponge. Always wring your sponge out thoroughly so it is not dripping.
What’s the best eco-friendly way to clean painted walls? A mixture of warm water and white vinegar is the gold standard. It is non-toxic, cheap, and effective. For tougher spots, a paste of baking soda and water works as a gentle abrasive.
Can I use vinegar to clean house walls? Yes, absolutely! White vinegar is safe for most walls. It kills bacteria and cuts through grease. However, do not use vinegar on unsealed stone or marble walls, as the acid can etch the stone. For painted drywall, it is perfect.