
Are you building a new home and wondering how to install plumbing? Proper house plumbing installation is crucial for your home’s functionality, safety, and longevity.
Why Proper Plumbing Installation Matters
Correct plumbing is the backbone of your home’s water supply and drainage system. It ensures that clean water reaches every faucet and toilet while safely removing waste. Improper installation can lead to leaks, water damage, and even health hazards. By following the steps outlined in this guide, you’ll be able to install plumbing that meets code requirements and stands the test of time.
Understanding Plumbing Systems in a New House
Before we dive into the installation process, let’s take a closer look at the components of a residential plumbing system.
Types of Plumbing Systems
When installing plumbing in a new house design, you’ll encounter different types of systems:
- Supply lines: Typically made of copper, PEX (cross-linked polyethylene), or CPVC (chlorinated polyvinyl chloride).
- Waste system: Usually constructed using PVC (polyvinyl chloride) or ABS (acrylonitrile butadiene styrene) pipes.
- Venting: Often made of the same materials as the waste system, with the addition of air admittance valves in some cases.
Plumbing Codes and Permits
Before beginning your plumbing installation, familiarize yourself with local plumbing codes and obtain any necessary permits. These regulations ensure that your plumbing system meets safety and performance standards.
Planning Your New House Plumbing Installation
Proper planning is essential for a successful plumbing installation in your new house. Let’s explore the key aspects of the planning process.
Importance of Thorough Planning
Careful planning helps you avoid costly mistakes and ensures that your plumbing system functions efficiently. By mapping out your plumbing layout in advance, you can optimize the placement of fixtures, minimize pipe runs, and anticipate potential challenges.
Reading and Interpreting Plumbing Blueprints
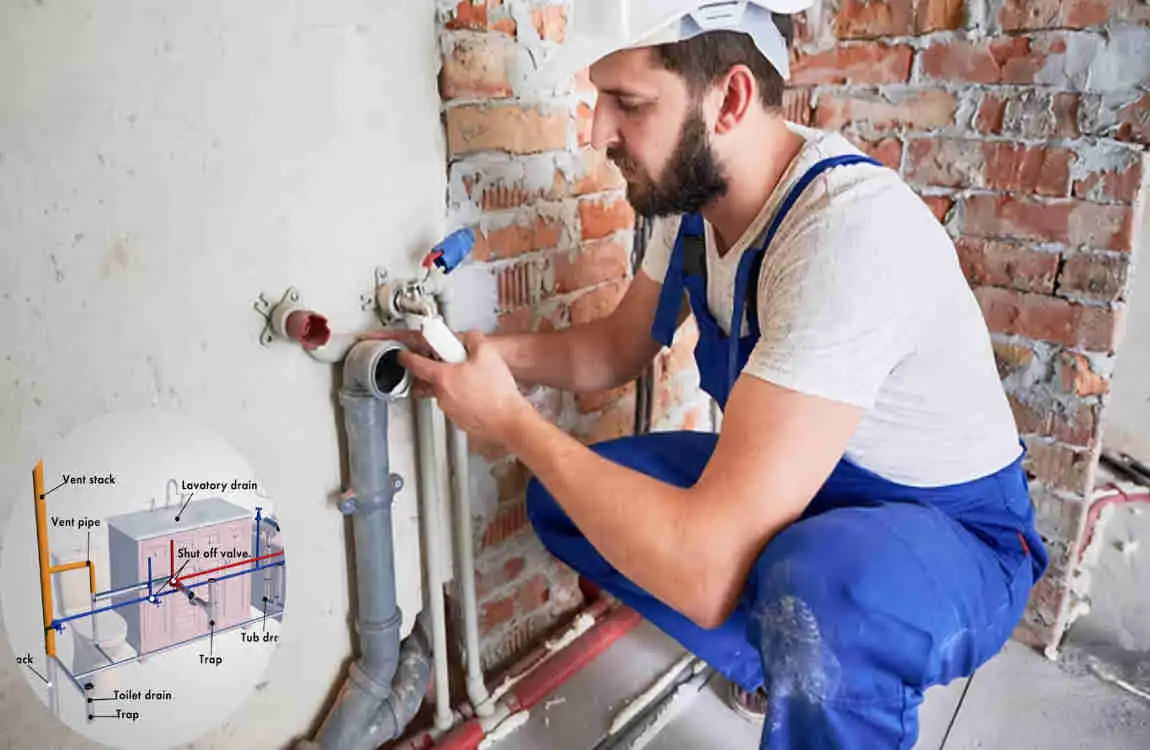
If your new house has plumbing blueprints or schematics, take the time to carefully study them. These drawings provide a visual representation of your plumbing system, showing the location of pipes, fixtures, and connections. Understanding the blueprints will help you plan your installation and communicate effectively with contractors.
Mapping Out Main Water Supply and Drainage Points
Identify the main water supply entry point and the location of your drainage system. These points will serve as the starting and ending points for your plumbing installation. Consider factors such as proximity to the municipal water source or septic system, as well as the layout of your home.
Installing the Main Water Supply Line
The first step in installing plumbing in a new house is to connect your home to the main water supply. Let’s walk through the process.
Locating the Main Water Supply Entry Point
Determine where your main water supply line will enter your home. This is typically near the front or side of the house, close to the municipal water source or your well. Consider factors like accessibility, freeze protection, and proximity to the meter or pressure regulator.
Trenching and Laying the Water Supply Pipe
Dig a trench from the main water supply to the entry point of your home. The trench should be deep enough to protect the pipe from freezing and damage. Lay the water supply pipe in the trench, ensuring it slopes gently towards the house to maintain proper flow.
Choosing the Right Pipe Material
Select a durable, code-compliant pipe material for your main water supply line. Common options include:
- PEX: Flexible and resistant to corrosion and freezing.
- Copper: Durable and long-lasting, but more expensive than PEX.
- PVC: Affordable and easy to work with, but not suitable for all climates.
Installing Shut-Off Valves and Pressure Regulators
Install a main shut-off valve near the point where the water supply enters your home. This valve enables you to shut off the water supply in the event of emergencies or repairs. If your water pressure exceeds the recommended level, install a pressure regulator to protect your plumbing system.
Testing the Main Supply Line for Leaks
Once the main water supply line is installed, perform a pressure test to verify that there are no leaks. Close all valves and fixtures, then pressurize the system using a pressure gauge. Monitor the pressure over time; if it drops, you may have a leak that needs to be addressed.
Installing Water Distribution Pipes
With the main water supply line in place, it’s time to install the water distribution pipes that will carry water to your fixtures.
Running Hot and Cold Water Lines
Plan the routes for your hot and cold water lines, ensuring they reach all necessary fixtures, such as sinks, showers, and toilets. Use color-coded pipes or labels to distinguish between hot and cold water lines.
Securing Pipes with Clips and Insulation
Use pipe clips or hangers to secure your water distribution pipes to the framing of your house. This prevents the pipes from sagging or shifting over time. In colder climates, insulate exposed pipes to avoid freezing and to reduce heat loss.
Understanding Gravity-Based Waste System Requirements
Most residential waste systems rely on gravity to carry wastewater to the main drain. To ensure proper flow, your drainage pipes must be sloped at the correct angle. The minimum slope required varies depending on the pipe size, but a general rule of thumb is 1/4 inch per foot.
Installing Drain Pipes with Proper Slope and Venting
When installing your drain pipes, maintain the required slope and ensure proper venting to prevent clogs. Use a level and a string line to guide your pipe installation, and install vent pipes at the appropriate locations to maintain flow and to avoid siphoning.
Connecting Fixtures to the Main Drain
Connect your kitchen sinks, toilets, showers, and washing machines to the main drain using the appropriate fittings and traps. Ensure that each fixture has a properly installed P-trap to prevent sewer gases from entering your home.
Use of Traps and Cleanouts
Install P-traps under each fixture to create a water seal that prevents sewer gases from entering your home. Also, install cleanouts at strategic locations in your waste system to provide access for maintenance and repairs.
Testing Waste Pipes for Smooth Drainage
Once your waste pipes are installed, perform a water test to ensure smooth drainage. Fill each fixture with water and observe the flow through the system. If you notice any slow drains or backups, you may need to adjust the slope or clear any obstructions to resolve the issue.
Venting the Plumbing System
Proper venting is essential for maintaining flow and preventing sewer gases from entering your home. Let’s explore the venting process.
Installing Roof Vents and Sealing to Prevent Leaks
When installing roof vents, ensure they are adequately sealed to prevent leaks. Use flashing and sealant to create a watertight connection between the vent pipe and the roof. Regularly inspect the vent pipes and seals to ensure they remain in good condition.
Quality Checks and Leak Testing
Before considering your plumbing installation complete, perform thorough quality checks and leak tests to ensure everything is functioning correctly.
Procedures to Pressure Test Water Supply Lines
To pressure test your water supply lines, follow these steps:
- Close all valves and fixtures.
- Attach a pressure gauge to the system.
- Pressurize the system to the recommended level (typically around 50-80 psi).
- Monitor the pressure over time; if it drops, you may have a leak that needs to be addressed.
Methods for Testing Drainage and Vent Systems
To test your drainage and vent systems, follow these steps:
- Fill each fixture with water and observe the flow through the system.
- Check for slow drains or backups, which may indicate issues with the slope or obstructions in the pipes.
- Inspect the vent pipes to ensure they are correctly connected and functioning.
Importance of Inspections and Compliance with Local Plumbing Codes
Before using your new plumbing system, have it inspected by a licensed plumber or local building authority to ensure compliance with plumbing codes. Addressing any issues identified during the inspection will help prevent future problems and ensure the safety and longevity of your plumbing system.