

A summer house is the part of the garden where you read, work, host friends or simply switch off. So when the roof starts to leak, it stops being a pleasant retreat very quickly. The good news is that learning how to felt a summer house roof is one of the more approachable DIY jobs around. With the right felt, a dry day and a methodical approach, most people can finish it in an afternoon.
Why Felting Your Summer House Roof Matters
Roofing felt is the waterproof skin on top of your roof boards. According to Screwfix, felt protects a home garden building from rain, wind and UV light, and it also reduces the condensation that builds up inside. Homebuilding & Renovating adds that sun, rain and wind gradually break felt down until it lets water in, which can rot the timber and leave the contents damp and mouldy.
Summer houses usually hold more than a lawnmower: cushions, furniture, books, maybe a desk and electronics. A failing felt roof is therefore a much more expensive problem than it first looks.
Which Felt Is Best for a Summer House Roof?
Choosing the right material matters more than any trick of technique. Screwfix breaks the main options down like this:
| Felt type | Typical lifespan | Best for |
|---|---|---|
| Standard bitumen (mineral) felt | 5 to 15 years | Tight budgets and sheltered gardens |
| Polyester-backed bitumen felt | 10 to 20 years | Most summer houses; tougher and longer lasting |
| EPDM roofing kit (single sheet) | Some carry 20-year guarantees | Easy fitting and longest life, at a higher price |
Lifespan ranges vary between publishers. Gardeningetc, quoting Homebase, puts standard mineral felt at up to around five years and polyester-reinforced felt at up to roughly 15 years when installed correctly. Treat all of these as guides rather than guarantees, since exposure and installation quality make a big difference.
One warning from Screwfix: self-adhesive and torch-on felts are not recommended for shed-style roofs, so stick with nail-fixed felt or an EPDM kit.
Tools and Materials You Will Need
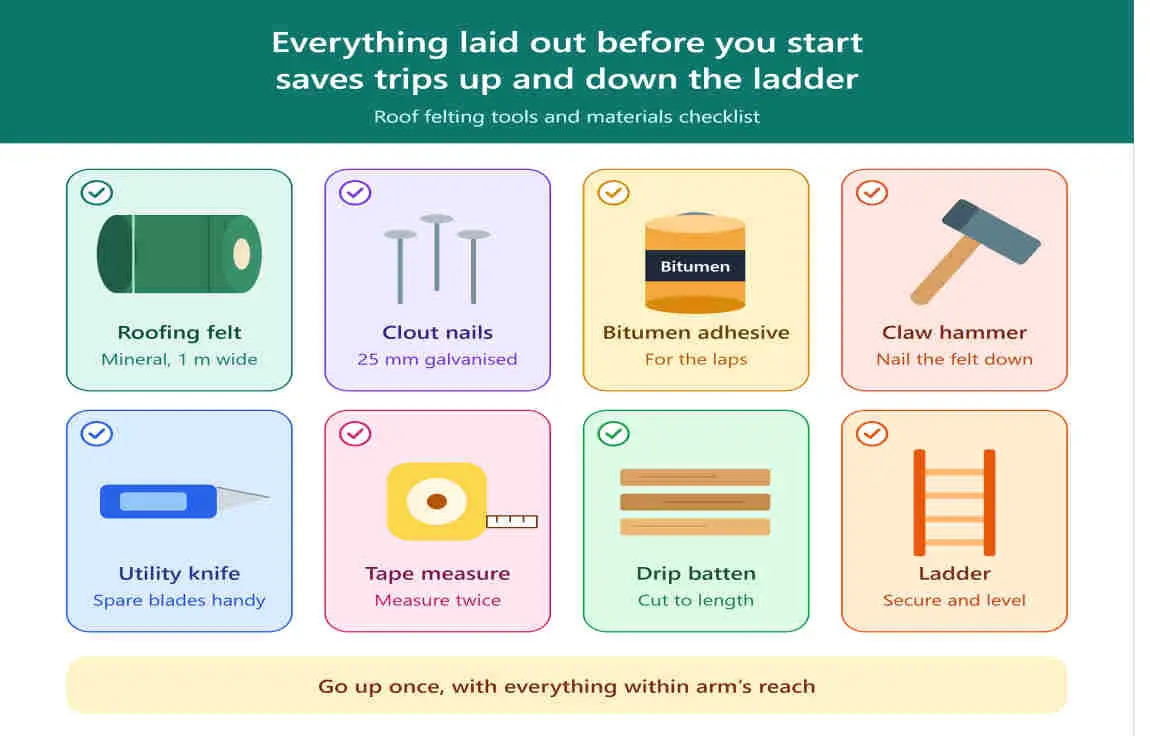
- Roofing felt (see sizing below)
- Galvanised clout nails for the felt, and galvanised nails for trim
- Claw hammer and a decorator’s scraper
- Tape measure, straight edge and a sharp Stanley knife
- Felt adhesive and a brush (for edges and overlaps only)
- Sturdy stepladder, gloves and safety goggles
- Timber battens or fascia strips for the edges
How Much Felt Do You Need?
Measure each roof slope first. Homebuilding & Renovating notes that shed felt is typically 1 m wide and 10 m long, so one roll covers 10 m². As an example, an 8 x 6 ft building needs about 8 m² once overlaps are included, which means roughly one roll cut into three strips. Larger summer houses will need more, so always measure your own roof and buy a little extra.
How to Felt a Summer House Roof: Step by Step
Pick the Right Day and Prepare the Felt
Choose a dry, calm day. Gardeningetc suggests temperatures ideally above 5°C (41°F), and recommends rolling the felt out at least 30 minutes beforehand so it flattens and becomes easier to handle. Do this on a patio or driveway rather than the lawn, as the grass beneath can turn temporarily yellow.
Remove the Old Felt and Check the Roof
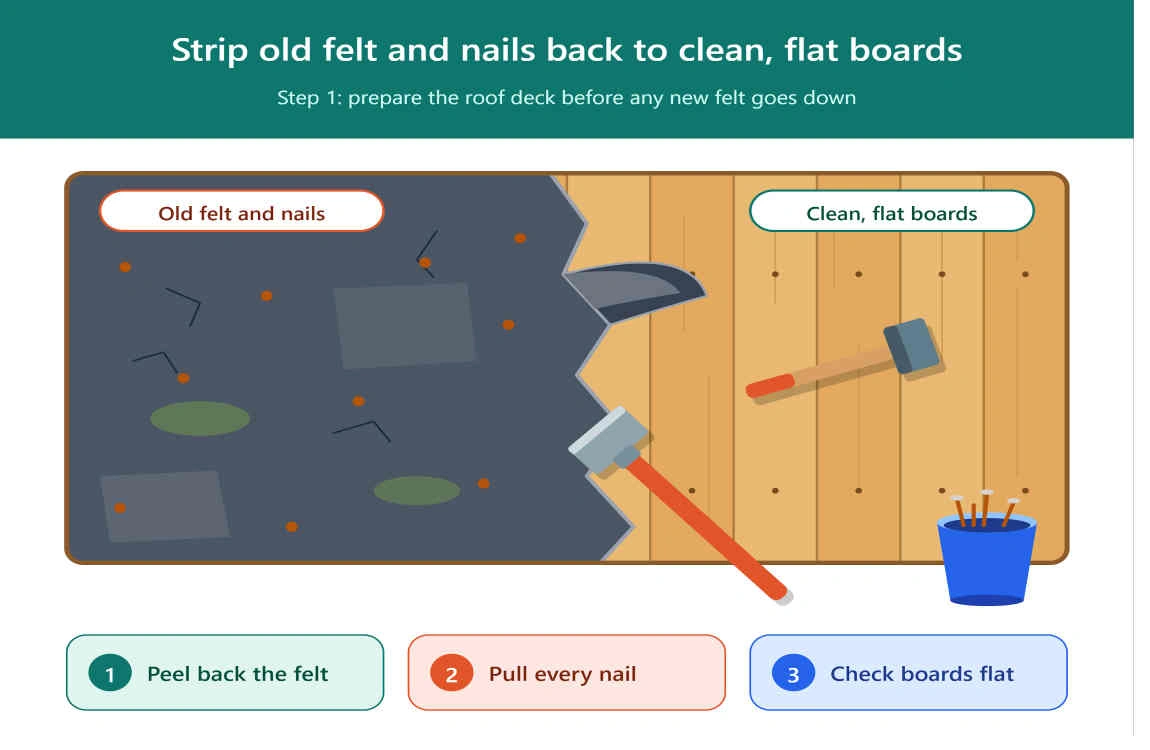
Take off any fascia or barge boards first, then pull up the old felt with a knife and scraper. Screwfix stresses removing every old nail and any leftover adhesive, because bumps and sharp edges can tear or crack new felt.
Now inspect the boards. Replace any rotten timber, hammer down raised boards, and let the roof dry fully before you continue. It is tempting to lay new felt over old, but both Homebuilding & Renovating and Gardeningetc advise against it, because stripping the roof lets you spot and fix hidden damage. If you truly must overlay, use nails long enough to go through the extra thickness.
Measure and Cut the Felt
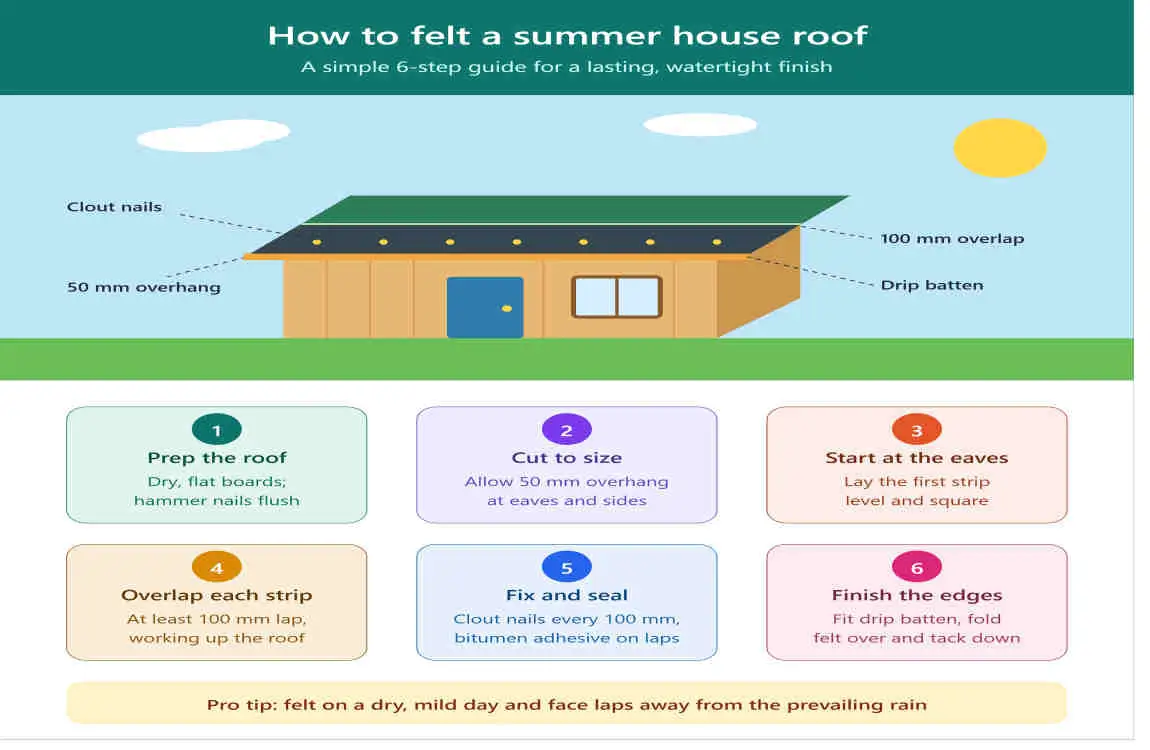
Most apex roofs take three pieces: one for each slope and a narrower strip over the ridge. Cut each piece longer than the roof so it overhangs at the ends. Screwfix recommends a 75 mm overhang at each end (so cut 150 mm longer than the roof) and 50 mm along the bottom edge, while Homebuilding & Renovating suggests roughly 100 mm at the ends. Either is workable; pick one and stay consistent. Use a straight edge and a sharp knife, and double-check measurements before cutting.
Fix the First Two Sheets
Start at the bottom of one slope. Position the sheet, pull it tight so it lies flat, and nail along the top edge with galvanised clout nails about 150 mm apart. Repeat on the other slope. You can leave the bottom-edge nails until all sheets are in place.
Add the Ridge Sheet
Lay the third sheet along the ridge so it overlaps both slopes by at least 50 mm. Gardeningetc suggests a more generous overlap of around 30 cm on each side for the ridge piece. Whichever you choose, the rule is the same: higher sheets must always overlap lower ones so water runs off the roof rather than under it. Fix with nails along both edges, and use adhesive on the overlaps if you want extra durability.
Fold, Secure and Trim the Edges
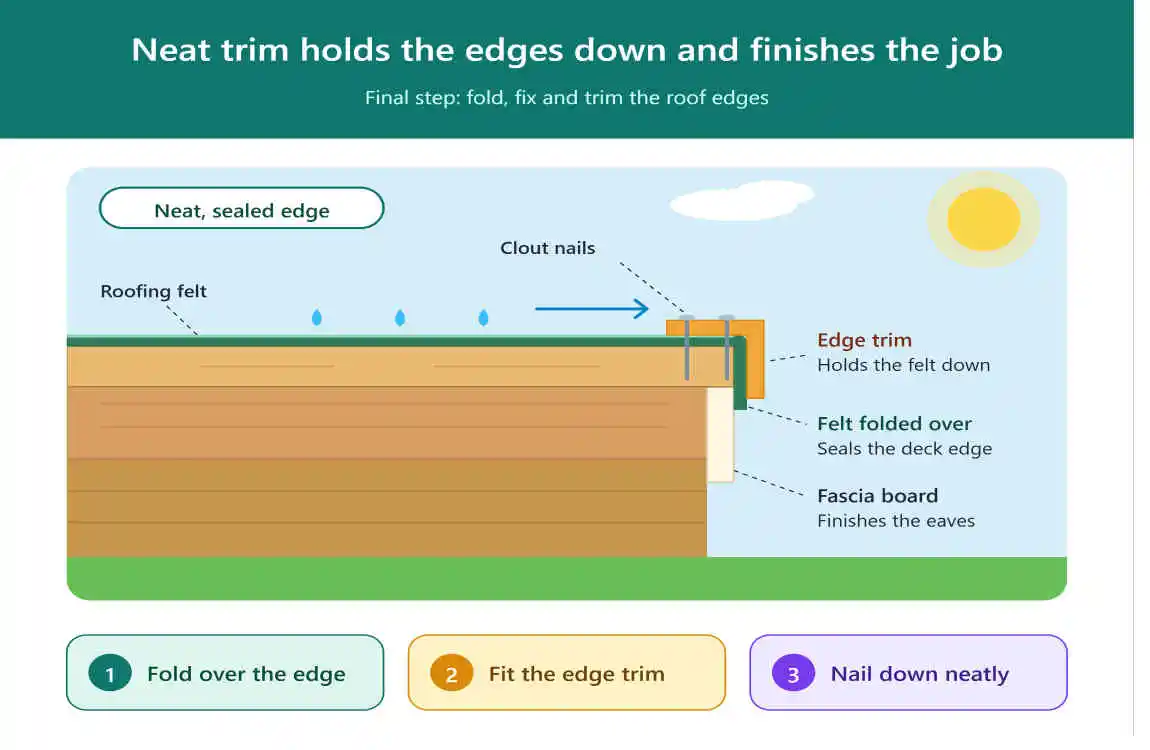
At the apex of each gable end, cut a short vertical slit in the overhang so it folds neatly. Then fold the felt over and nail it down. Screwfix advises avoiding cuts at the bottom corners: fold the felt inwards and downwards so water runs off easily, then hide the fold under the trim.
Refit the fascia boards or add timber battens with galvanised nails, then trim any excess felt with your knife for a clean, professional edge.
Adapting the Method to Your Summer House Roof Shape
- Apex roof: three strips as above. On wide buildings you may need more than one strip per slope, laid from the bottom up with each upper strip overlapping the lower one.
- Pent (single slope) roof: work from the bottom to the top with overlapping strips. Buildworld advises not fitting fascia boards at the back of a pent roof, as they can hold water.
- Lean-to roof: Buildworld says one piece is usually enough, with a narrower strip along the top edge overlapping the back wall by roughly 5 cm if the building is freestanding.
- Corner or unusual shapes: these need more careful planning, so measure each section separately and consider an EPDM kit made to size.
Common Mistakes to Avoid
- Gluing the whole sheet down. Gardeningetc, citing Buildworld, explains that felt and timber expand and contract at different rates. Gluing the entire sheet to the boards leaves no give, which can lead to cracking or tearing. Use adhesive only at edges and overlaps.
- Laying felt over a wet or damaged roof. Trapped moisture and weak boards will shorten the life of even the best felt.
- Overlapping the wrong way. Always overlap so water flows off the roof.
- Choosing the cheapest felt. Replacing thin felt every couple of years costs more in the long run than buying a tougher grade once.
- Skipping safety. Use a stable ladder, wear gloves and goggles, and never work in wet or windy weather.
How Often Should You Re-Felt a Summer House Roof?
Homebase says felt on an exposed home building may need replacing every two to three years, while a sheltered one can last longer. A sensible habit is to check the roof once a year for lifted edges, tears, bubbling or damp patches inside, and to repair small problems early before they become a full re-felt.
Frequently Asked Questions
Can I felt a summer house roof myself?
Yes. Most guides describe it as a straightforward DIY job, even for beginners, provided you plan carefully and work safely at height.
Can I felt over old felt?
It is possible but not recommended. Removing the old felt lets you inspect and repair the boards underneath, which prevents hidden rot from spreading.
Is it better to use nails or adhesive?
Use nails as the main fixing, with adhesive only on overlaps and edges. Fully gluing the felt can restrict movement and cause cracking.
What is the longest-lasting option?
An EPDM roofing kit generally outlasts bitumen felt and some come with manufacturer guarantees of around 20 years, though they cost more up front.
What if my summer house has an insulated or lined roof?
The felting steps are the same, but check your manufacturer’s instructions before you start, since build-ups and ventilation requirements can differ from a basic shed roof.
Final Thoughts
The best way to felt a summer house roof comes down to four things: choose a good-quality polyester-backed felt (or an EPDM kit if you want longevity), strip and repair the roof properly, lay each sheet so water always runs off, and fix the edges neatly with nails rather than glue alone. Do that on a dry, mild day and your summer house should stay watertight for years.
