
Have you ever tried to move a new vanity into your bathroom only to realize the doorway is just an inch too narrow? Or perhaps you are looking ahead and realizing that your home needs to be more accessible for a family member who uses a walker or wheelchair. It is a common frustration. Many older homes were built with narrow, 24-inch or 28-inch bathroom doors that feel more like a squeeze than an entrance.
Learning how to widen a bathroom doorway is one of the most rewarding DIY projects you can take on. Not only does it make your daily life easier, but it also adds significant value to your home. Whether you are aiming for ADA compliance, preparing for “aging in place,” or want a more open and modern feel, this guide has you covered.
Why Widen Your Bathroom Doorway? Benefits and Common Reasons
Before you pick up a sledgehammer, it helps to understand why this project is such a high priority for many homeowners. Widening a door isn’t just about aesthetics; it’s often about necessity and safety.
Accessibility and Aging in Place
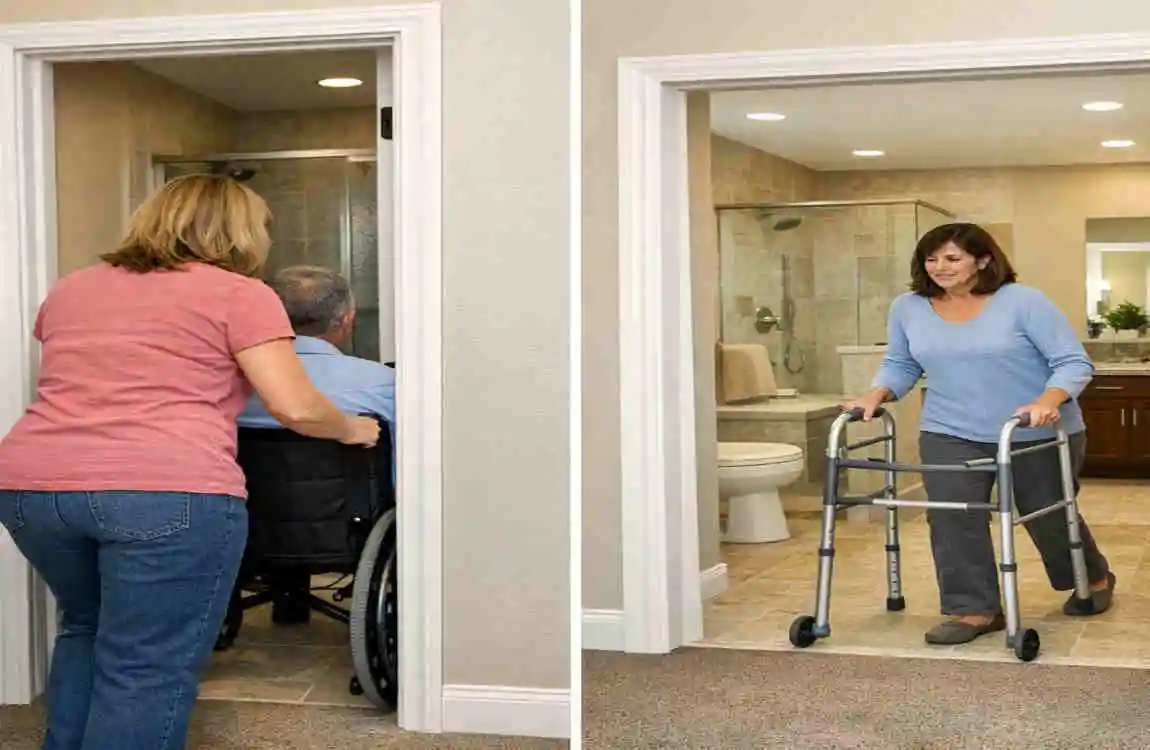
The most common reason people search for how to widen a bathroom doorway is for wheelchair access. Standard interior doors are often too narrow for a wheelchair to pass through comfortably. The ADA (Americans with Disabilities Act) suggests a minimum clear width of 32 inches, though 36 inches is often preferred for ease of movement. If you plan on staying in your home as you get older, making these changes now ensures you won’t have to rush into a renovation later during a medical emergency.
Moving Large Fixtures
Are you planning a master bath remodel? If you have your eye on a large soaking tub or a double-sink vanity, they won’t fit through a 24-inch door. Widening the frame during the early stages of a renovation saves you the headache of trying to “pivot” a heavy porcelain tub through a tiny gap.
Increasing Home Value
Homebuyers today look for “universal design” features. A home that is already accessible is a huge selling point. By widening your bathroom door, you are future-proofing your property. Data suggests that accessibility upgrades can boost a home’s resale value by anywhere from 5% to 10%.
BenefitDetailsImpact
Accessibility Meets 32″ minimum width, Safer for mobility aids
Home Value +5-10% resale boost, Higher demand from buyers
Daily Use Easier entry/exit Reduces daily frustration
Cost Savings DIY under $500 Professional can cost $1,500+
Assessing Your Bathroom Doorway: Is Widening Feasible?
Before you start tearing down drywall, you need to do some detective work. Not every wall is created equal, and some doorways are more challenging to move than others.
Measuring Your Current Setup
First, grab your tape measure. You need to measure the “clear width” of the door. This is the space available when the door is open at 90 degrees. If your current opening is 24 to 30 inches, you are likely feeling the squeeze. Your goal should be to reach at least 32 inches of clear space, which usually requires a “rough opening” of about 34 inches.
The Load-Bearing Wall Question
This is the most critical part of the assessment. Is the wall you want to cut into holding up your roof or the floor above it?
- Non-Load-Bearing: These are “partition walls.” They divide rooms and are relatively easy to work with.
- Load-Bearing: These walls support the weight of the house. If you cut into one without properly supporting it with a temporary header, your ceiling could sag or, worse, collapse.
Feasibility Checklist
- Check for Utilities: Are there light switches, outlets, or plumbing pipes inside the wall section you want to remove? Moving a light switch is easy; moving a main soil pipe for a toilet is a massive job.
- Wall Material: Is it drywall or lath and plaster? Drywall is easy to cut; plaster is messy and requires more care to avoid cracking the whole wall.
- Local Building Codes: In many areas, including Lahore and Punjab, specific renovations require a quick permit check to ensure you are following safety standards.
Tools and Materials: What You Need to Widen a Bathroom Doorway
To do a professional-looking job, you need the right gear. You don’t want to be halfway through a cut and realize you don’t have a level.
Essential Tools
- Reciprocating Saw (Sawzall): This is your best friend for cutting through old studs and nails.
- Power Drill: For driving long screws into your new framing.
- Pry Bar: Essential for removing old trim and door jambs without destroying them (if you plan to reuse anything).
- Level (at least 4 feet): If your new door isn’t perfectly level, it will swing open or shut on its own.
- Safety Gear: Do not skip the goggles and gloves. Drywall dust and flying splinters are no joke.
Materials List
You will need to head to your local hardware store. If you are in Lahore, areas near Anarkali Bazaar or the hardware hubs near Packages Mall are great places to source these.
ItemQuantityEstimated Cost (PKR)
New Door Jamb Kit 1 set 5,000 – 10,000
Drywall Sheets 2-3 2,000 – 3,500
2×4 Lumber (Studs) 4-6 pieces 3,000 – 5,000
Shims and Screws 1 box each 1,500
Joint Compound/Tape 1 bucket 2,000
Paint and Primer 1 quart 1,500 – 2,500
Step-by-Step Guide: How to Widen a Bathroom Doorway DIY
Now we get to the heart of the project. This is a big task, but breaking it down into phases makes it much more manageable.
Preparation and Demolition
You cannot start cutting until the area is safe.
- Shut off the Power: Use a voltage tester to make sure no live wires are in the wall you are about to cut.
- Protect the Floors: Use drop cloths or old cardboard. Construction debris can instantly scratch tile or wood floors.
- Remove the Old Door: Pop the hinge pins out and set the door aside.
- Remove Trim: Use your pry bar to gently pull the casing (the decorative wood) away from the wall.
- Take out the Jamb: Cut through the nails holding the door frame to the studs and pull the entire frame out.
Cutting and Framing
This is where the transformation happens. You are going to create a “rough opening” that is about 2 inches wider than the actual door you plan to install.
- Mark Your Lines: Use a pencil and a level to mark the locations of the new studs.
- Cut the Drywall: Use a utility knife or a small drywall saw. Only cut what you need to!
- Remove the Old Studs: Use your reciprocating saw to cut the studs at the top and bottom.
- Install the New Header: The header is the horizontal beam that spans the top of the door. It carries the weight of the wall above the opening.
- Install King and Jack Studs:
- King Studs: Run from the floor plate to the top plate.
- Jack Studs: Sit inside the king studs and support the header.
- Make sure everything is plumb (perfectly vertical).
Installation and Finishing
Your “hole in the wall” now needs to become a doorway again.
- Set the New Jamb: Place the door frame into the rough opening. Use wooden shims between the frame and the studs to level it perfectly.
- Secure the Frame: Screw through the jamb and shims into the studs.
- Drywall Patching: You will likely have a gap between the new frame and the old wall. Cut pieces of drywall to fit, screw them in, and use joint compound (mud) and tape to smooth the seams.
- Sanding and Painting: Once the mud is dry, sand it smooth. This is the messiest part, so keep that vacuum handy! Apply primer and then your final paint color.
- Install Trim and Door: Nail your new decorative casing around the door and hang the door on its hinges.
Common Mistakes to Avoid
- The “Wandering” Level: Always check for the level at every single step. If the frame is even slightly tilted, the door will never stay closed.
- Ignoring the Floor: When you widen a door, you will often find a gap in the flooring where the old wall used to be. You may need a wider transition strip or a piece of matching tile to bridge the gap.
- Skipping Insulation: If it’s an interior wall, stuffing a little fiberglass insulation around the frame can help with soundproofing—something everyone appreciates in a bathroom!
Cost Breakdown: Budgeting to Widen a Bathroom Doorway
Budgeting is where most DIY projects go off the rails. It is essential to be realistic about what you will spend.
If you do the work yourself, your primary costs are materials. In 2026, with inflation and material costs in regions like Pakistan, you can expect to spend between 20,000 and 80,000 PKR, depending on the quality of the door you choose. A solid wood door will cost significantly more than a hollow-core door.
If you decide to hire a professional contractor in a city like Lahore, the labor costs will add up. A skilled carpenter might charge 5,000 to 10,000 PKR per day, and this project usually takes 2 to 3 days from start to finish. Total professional costs can range from 100,000 to 300,000 PKR, depending on whether you include high-end finishes and structural work.
How to Save Money:
- Reuse Hardware: If your old hinges and handles are in good shape, clean them up and reuse them.
- Buy Local: Visit local timber markets rather than big-box retailers to get better deals on lumber.
- Do the Prep Yourself: Even if you hire a pro for the framing, you can save money by doing the demolition and the final painting yourself.
Alternatives If DIY Isn’t for You

Maybe you looked at the “load-bearing wall” section and felt a bit nervous. That’s okay! There are ways to get more space without a full-scale demolition.
Offset Hinges Swing-Clear Hinges
This is the “secret weapon” of bathroom renovations. Offset hinges are designed to swing the door completely out of the opening. This can give you an extra 2 inches of clear space without touching a single stud. It is the cheapest and easiest way to “widen” a door for a walker.
Barn Doors
If you have the wall space next to the bathroom, a sliding barn door is a fantastic option. You can widen the opening and have the door slide along a track on the outside of the wall. This eliminates the “swing space” needed inside a cramped bathroom.
Pocket Doors
These are beautiful and save a ton of space, but they are challenging to install in an existing wall because you have to remove the entire wall section to install the “pocket” the door slides into. If you are already widening the doorway, this might be the perfect time to consider a pocket door.