
Rosemary tiles have been a hallmark of traditional roofing for over 175 years, combining the timeless appeal of handcrafted clay with modern manufacturing precision. Known for their distinctive cross-camber shape and smooth finish, these tiles offer aesthetic charm and durable performance for pitched roofs. Effectively using Rosemary tiles for roof tiling involves understanding their specific installation requirements, such as appropriate roof pitch, fixing methods, and overlap specifications, to ensure a weatherproof and long-lasting roof. This guide will walk you through the essential steps and best practices to achieve a high-quality Rosemary tile roof that enhances your home’s beauty and protection.
Benefits of Using Rosemary Tiles for Roofing

Rosemary tiles are a timeless choice for roofing, combining aesthetics with practicality. Their classic design adds character to any home, making them popular among homeowners and architects.
One of the standout benefits is durability. Made from high-quality clay, rosemary tiles can withstand harsh weather conditions while maintaining their shape and color over time. This longevity means less frequent replacements and lower maintenance costs.
They help regulate indoor temperatures, reducing heating and cooling bills in the long run. This energy efficiency not only saves money but also contributes to environmental sustainability.
The natural, earthy tones of rosemary tiles enhance curb appeal too. With various finishes available, they easily complement different architectural styles—whether traditional or modern.
Installing rosemary tiles boosts property value significantly due to their aesthetic charm and functional advantages. It’s an investment that pays off in more ways than one.
Types of Rosemary Tiles Available

Rosemary tiles come in various styles, offering unique aesthetic and functional advantages. One common type is the plain tile. This classic design emphasizes simplicity while providing a traditional appearance.
Next up are interlocking rosemary tiles, which feature a clever design allowing easy installation. Their shape helps reduce water penetration, making them an excellent choice for homes in wetter climates.
For those seeking something more decorative, ornamental rosemary tiles are available. These often include intricate patterns or textures that enhance the visual appeal of any roof.
Consider color options. Rosemary tiles can be found in earthy tones like terracotta or slate gray. Each shade brings its character to your home’s exterior, ensuring you find the perfect match for your style preferences.
Preparing for Installation: Tools and Materials Needed

Before laying down rosemary tiles, ensure you have the right tools and materials at your disposal. This preparation will help streamline the process.
You’ll need a sturdy ladder to access your roof safely. A measuring tape is essential for the accurate spacing of tiles. Also, grab a chalk line to mark straight lines on your roofing surface.
A tile cutter or wet saw will be necessary to trim tiles. Don’t forget about safety gear! Gloves and goggles protect against debris while working.
Gather quality underlayment as well; it provides extra protection against moisture. Secure enough nails or fasteners designed specifically for rosemary tiles for installation stability. With these tools in hand, you’re ready to confidently begin the tiling journey!
Step-by-Step Guide to Installing Rosemary Tiles
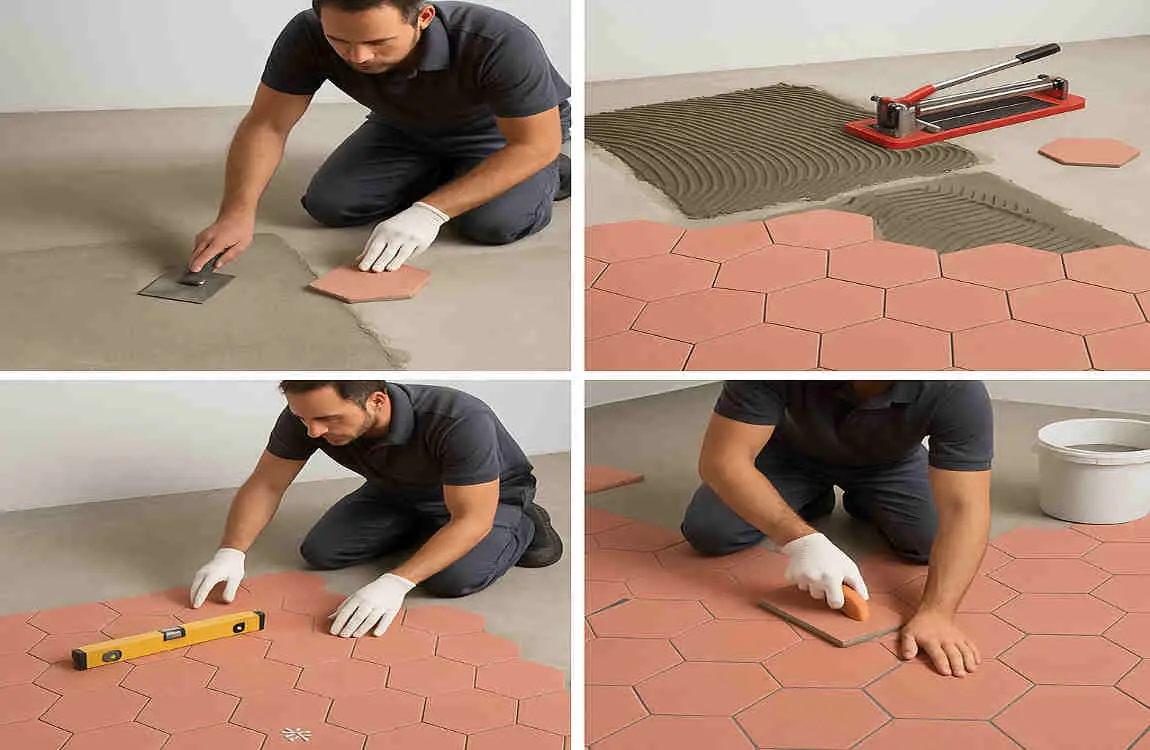
Start by measuring your roof. Knowing the area will help determine how many rosemary tiles you need.
Next, prepare your roof deck. Ensure it’s clean and free from debris. A solid foundation is essential for a successful installation.
Lay down roofing felt over the decking to provide an additional moisture barrier. Secure it well with staples or nails.
Begin at the roof’s eaves, placing your first row of rosemary tiles tightly against one another. Maintain proper alignment as you work across.
For each subsequent row, stagger the joints to enhance strength and prevent leaks. Use tile clips where needed for extra security.
After laying all rows, inspect for any loose tiles or gaps in coverage. Proper sealing around edges is vital to protect against weather elements.
Step back and admire your new rosemary-tiled roof! The aesthetic appeal and durability are sure to impress.
Maintenance Tips for Long-lasting Rosemary Roofs

Maintaining your rosemary roof is essential to ensure its longevity and performance. Regular inspections should be part of your routine. Check for any loose tiles or signs of wear, especially after severe weather events.
Cleaning the roof periodically helps prevent moss and algae buildup. Use a soft-bristled brush or low-pressure washer to remove debris without damaging the tiles. If you spot any damaged tiles during inspections, replace them promptly to avoid leaks.
Ensure that gutters are clear and functioning well, as they are crucial in directing water away from the roof structure. This can help prevent unnecessary moisture accumulation, which is detrimental to the roofing material and underlying structures.
Consider applying a protective sealant designed for rosemary tiles if recommended by your supplier or installer. This can enhance their durability against harsh weather conditions while maintaining their aesthetic appeal.
Following these maintenance tips will keep your rosemary tiled roof looking great while extending its lifespan significantly. A little effort goes a long way in preserving such an attractive feature in your home!
How to Tile a Roof with Rosemary Tiles: FAQ
Q: What are Rosemary tiles?
Rosemary tiles are traditional clay roof tiles known for their durability, natural colour, and classic appearance, often used in heritage or period-style homes.
Q: Can I install Rosemary tiles myself?
You can, but only if you have roofing experience. Rosemary tiles are heavy and fragile, and incorrect installation can cause leaks. Most homeowners hire a professional roofer.
Q: What surface do I need before laying Rosemary tiles?
You need a solid, well‑ventilated roof deck, covered with breathable underlay or felt battens before tiling begins.
Q: How do you fix Rosemary tiles in place?
They are typically fixed using nails or clips on battens. Every tile should overlap the one below to create a watertight system.
Q: What spacing is required for battens?
Batten spacing depends on tile size and roof pitch. Most Rosemary tiles require a 100–115 mm gauge, but always check the manufacturer’s instructions.
Q: What roof pitch is suitable for Rosemary tiles?
A minimum pitch of 35° is usually required to ensure proper water run‑off.
Q: Are Rosemary tiles easy to cut for edges and valleys?
They can be cut with a wet tile saw or angle grinder, but clay tiles are brittle, so cuts must be precise.
Q: Do Rosemary tiles require ventilation?
Yes. Proper eaves and ridge ventilation is essential to prevent condensation and prolong roof life.
Q: How long do Rosemary tiles last?
High‑quality Rosemary clay tiles can last 60–100 years with proper installation and maintenance.