Spray painting bedroom furniture is a popular and cost-effective way to breathe new life into old or outdated pieces. Whether you’re looking to update the color scheme of your bedroom or simply want to give your furniture a fresh look, spray painting can be an excellent option. This article will guide you through the process, from preparation to finishing touches, and provide tips to ensure a professional-looking result.
Why Choose Spray Paint?

Advantages of Spray Painting
Bold Heading: Efficient and Smooth Finish
Spray painting offers several advantages over traditional brush painting:
- Efficiency: Spray painting covers large surfaces quickly and evenly, reducing the time and effort required.
- Smooth Finish: Unlike brush painting, which can leave brush strokes, spray painting provides a smooth, even finish.
- Versatility: Spray paint adheres well to various materials, including wood, metal, and plastic, making it suitable for different types of furniture.
- Variety of Colors and Finishes: Spray paints come in a wide range of colors and finishes, from matte to glossy, allowing for creative flexibility.
Considerations Before You Start
Bold Heading: Assessing Suitability
Before you decide to spray paint your bedroom furniture, consider the following:
- Condition of Furniture: Ensure the furniture is structurally sound and free from extensive damage that paint alone cannot fix.
- Type of Material: Different materials may require specific types of spray paint and preparation methods.
- Space and Ventilation: Spray painting should be done in a well-ventilated area to avoid inhaling fumes and ensure proper drying.
Preparation is Key
Gathering Supplies
Bold Heading: Essential Tools and Materials
To achieve the best results, gather the necessary supplies:
- Spray paint (suitable for your furniture material)
- Primer (if required)
- Sandpaper (medium and fine grit)
- Painter’s tape
- Drop cloths or plastic sheeting
- Protective gear (mask, gloves, and goggles)
- Cleaning supplies (soap, water, and a degreaser)
Cleaning the Furniture
Bold Heading: A Clean Surface
Thoroughly clean the furniture to remove dust, dirt, and grease. Use a mixture of soap and water for general cleaning, and a degreaser for stubborn grime. Allow the furniture to dry completely before proceeding to the next step.
Sanding the Surface
Bold Heading: Ensuring Adhesion
Sanding the furniture is crucial for ensuring the spray paint adheres properly:
- Medium Grit Sandpaper: Start with medium grit sandpaper (around 120 grit) to remove the existing finish and smooth out imperfections.
- Fine Grit Sandpaper: Follow with fine grit sandpaper (around 220 grit) to create a smooth surface for painting.
- Cleaning: Wipe down the furniture with a damp cloth to remove sanding dust.
Applying Primer
Bold Heading: Preparing for Paint
Primer helps the paint adhere better and provides a uniform surface:
- Choose the Right Primer: Select a primer suitable for your furniture material (e.g., wood, metal, or plastic).
- Application: Apply the primer in thin, even coats. Follow the manufacturer’s instructions for drying times between coats.
- Sanding After Priming: Lightly sand the primed surface with fine grit sandpaper to ensure smoothness.
Spray Painting Your Furniture
Choosing the Right Spray Paint
Bold Heading: Color and Finish
Select a spray paint that suits your aesthetic preferences and furniture material:
- Color: Choose a color that complements your bedroom decor.
- Finish: Decide between matte, satin, or glossy finishes based on your desired look.
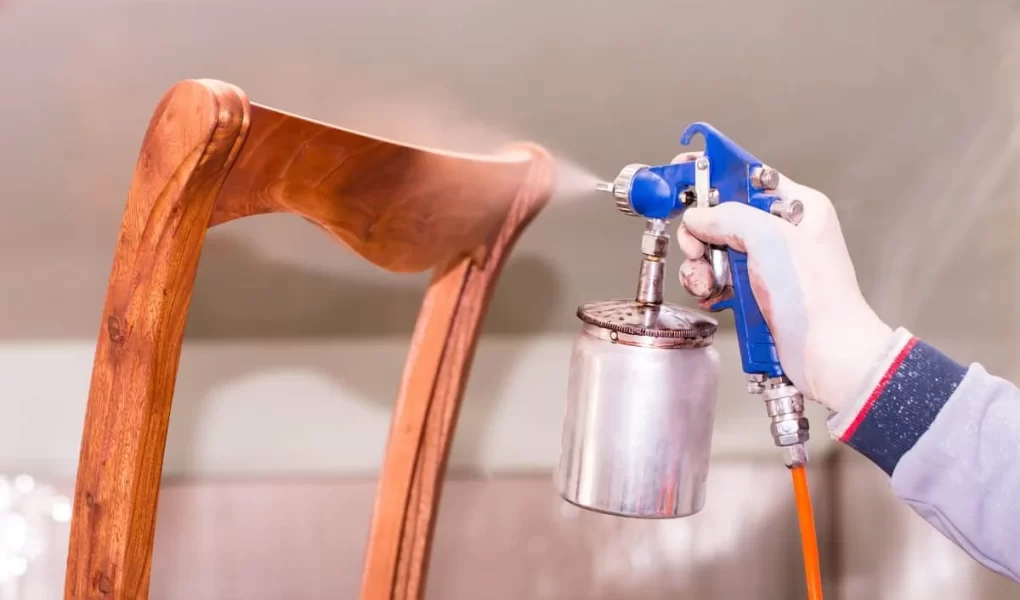
Painting Technique
Bold Heading: Achieving an Even Coat
Follow these tips for a professional-looking finish:
- Test Spray: Before painting your furniture, test the spray paint on a piece of cardboard to ensure proper spray pattern and color.
- Distance and Motion: Hold the spray can about 10-12 inches from the surface and use a sweeping motion to apply the paint. Avoid lingering in one spot to prevent drips.
- Thin Coats: Apply multiple thin coats rather than one thick coat. Allow each coat to dry according to the manufacturer’s instructions before applying the next.
- Even Coverage: Ensure even coverage by spraying from different angles and overlapping each pass slightly.
Drying and Curing
Bold Heading: Patience Pays Off
Proper drying and curing are essential for a durable finish:
- Drying Time: Allow the final coat of paint to dry thoroughly. This can take several hours to a day, depending on the paint and environmental conditions.
- Curing Time: Full curing can take up to a week. Avoid heavy use of the furniture until it has fully cured to prevent damage to the finish.
Finishing Touches
Protective Coating
Bold Heading: Ensuring Longevity
For added durability, consider applying a protective clear coat:
- Type of Clear Coat: Choose a clear coat suitable for your paint type (e.g., water-based or oil-based).
- Application: Apply the clear coat in thin, even layers, allowing each coat to dry completely before adding the next.
Reassembly and Placement
Bold Heading: Final Steps
Once the paint and clear coat have dried and cured, reassemble any parts you may have removed and place the furniture back in your bedroom. Be gentle during reassembly to avoid scratching the new paint.
Maintenance and Care
Regular Cleaning
Bold Heading: Keeping It Fresh
Maintain your newly painted furniture by:
- Dusting: Regularly dusting with a soft cloth to prevent dirt buildup.
- Gentle Cleaning: Cleaning with a damp cloth and mild soap as needed. Avoid abrasive cleaners that can damage the paint.
Handling with Care
Bold Heading: Preventing Damage
Handle your painted furniture with care to avoid scratches and chips:
- Use Coasters and Mats: Protect the surface from hot or wet items.
- Avoid Sharp Objects: Prevent contact with sharp objects that can scratch the paint.